
It’s super frustrating when your meat thermometer just stops working, especially after you’ve given it a good wash. You might think, “Oh no, I broke it!” but the truth is, the Meat Thermometer Not Working After Washing is a really common problem for folks who are just starting out with cooking or using these handy tools. Don’t worry, it’s usually an easy fix!
We’ll walk through it step-by-step to get your thermometer back to its old reliable self. Ready to find out why this happens and how to solve it?
Why Your Meat Thermometer Might Be Acting Up After Washing
When your trusty meat thermometer decides to take a break after a bath, it can leave you scratching your head. This is a frequent hiccup for many home cooks, often stemming from simple oversights rather than major mechanical failures. The core of the issue usually boils down to how water interacts with the thermometer’s delicate internal components.
Many digital meat thermometers are not fully waterproof, and even if they are, moisture can sometimes find its way into places it shouldn’t be, messing with the electronics or the battery connection. For beginners, the fear of damaging a new gadget can be quite high, leading to a bit of panic. This section will explore the common reasons behind a Meat Thermometer Not Working After Washing, helping you pinpoint the exact cause so you can fix it quickly.
The Mysterious Case of the Wet Electronics
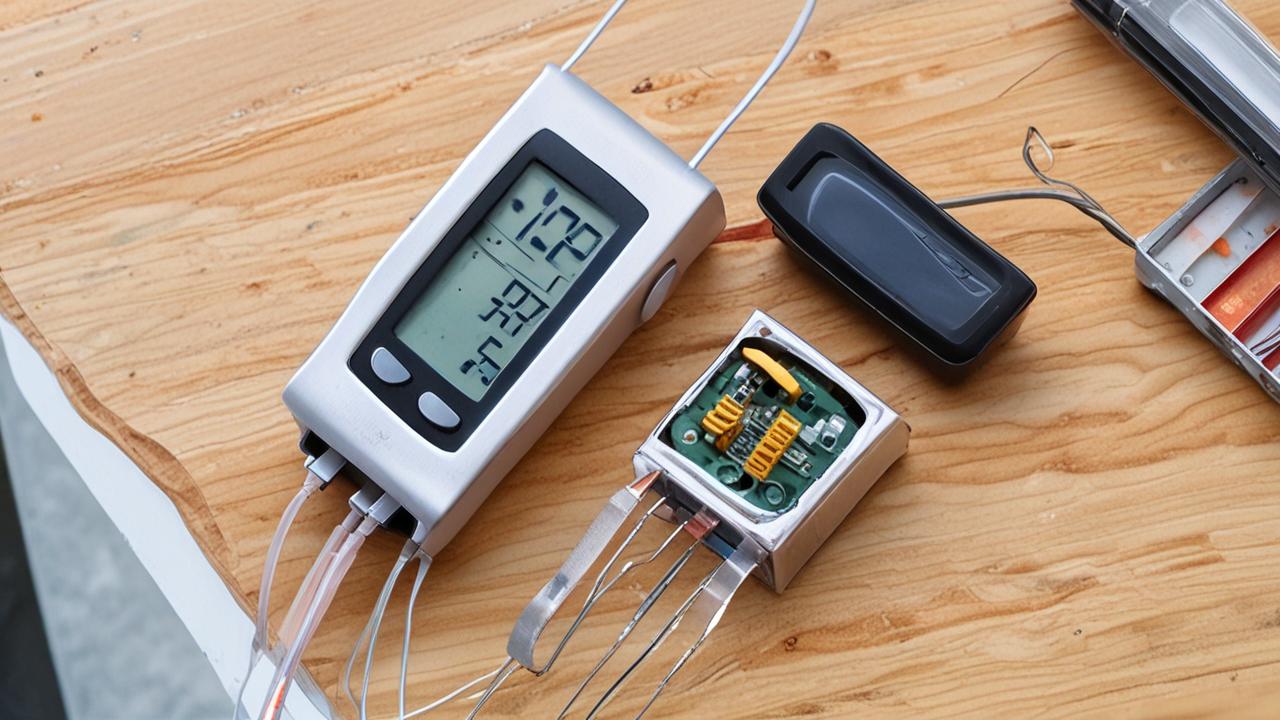
Digital meat thermometers, while brilliant for ensuring perfectly cooked food, often contain sensitive electronic parts. These aren’t designed to be submerged or even heavily splashed with water, unlike many kitchen appliances. When water seeps into the casing, it can create a short circuit or interfere with the electrical signals that the thermometer uses to measure temperature.
Think of it like a tiny computer getting wet; it can cause all sorts of unpredictable behavior.
This moisture can originate from a few places. If you’ve washed the thermometer under a running tap for too long, or if water has gotten into the seam where the probe meets the handle, trouble can start. Even condensation can be a culprit if the thermometer is moved from a cold environment to a warm, humid one too quickly.
Key takeaway: Most digital thermometers are water-resistant, not waterproof. This means a quick wipe-down is usually fine, but a full soak or vigorous washing can lead to problems.
Battery Blues: The Power Source Problem
The battery is the heart of any digital thermometer. When a Meat Thermometer Not Working After Washing occurs, a common culprit is a battery that has become dislodged, corroded, or simply isn’t making proper contact after being exposed to water. Moisture can sometimes get around the battery compartment seal, even if it’s designed to be somewhat protected.
This can lead to a poor connection, or in worse cases, corrosion that hinders the flow of electricity.
When you wash the thermometer, especially if you turn it upside down or shake it, the battery might shift. If it’s not seated perfectly, the device won’t power on. Additionally, if water has entered the battery compartment and dried, it can leave behind mineral deposits that act as insulators, preventing the battery from connecting properly.
Always check the battery first when your thermometer acts up after washing. It’s the simplest and most common fix. Ensuring the battery is fresh and clean, and that the contacts are free from moisture or debris, can solve the problem instantly.
The Probe’s Predicament: Sensor Issues
The probe is the part that actually goes into the meat. It contains the sensor that reads the temperature. While the probe itself is usually made of stainless steel, the connection point between the probe and the thermometer’s body can be a weak spot for water entry.
If water gets into this junction, it can damage the delicate wiring or the sensor itself.
Sometimes, water can cause a temporary malfunction of the sensor, leading to inaccurate readings or no reading at all. It might also interfere with the digital signal that transmits the temperature from the probe to the display. This can make the thermometer seem broken when it’s just experiencing a temporary electrical hiccup due to moisture.
Scenario: Imagine you’ve finished grilling and need to clean up. You rinse the thermometer probe under the tap, but some water splashes up and gets into the small gap where the metal probe meets the plastic handle. This water might then trickle down into the thermometer’s electronics.
Understanding “Water-Resistant” vs. “Waterproof”
This is a crucial distinction for any electronic device, especially kitchen tools. When a product is described as “water-resistant,” it means it can handle minor splashes or brief exposure to water without immediate damage. Think of a smartphone with a good water-resistance rating; it can survive a short drop in the sink but isn’t meant for swimming.
On the other hand, “waterproof” means the device can be fully submerged in water for a significant period without harm. Very few meat thermometers are truly waterproof. Most digital models are only water-resistant, meaning you should avoid washing them directly under running water or submerging them.
For a meat thermometer, a water-resistant rating usually means you can wipe the probe clean with a damp cloth or gently wash the probe itself, but you must be careful to keep the handle and the display area dry. Understanding this difference is key to preventing the Meat Thermometer Not Working After Washing issue in the first place.
Troubleshooting Steps for a Wet Thermometer
Don’t despair if your thermometer has encountered some moisture! Most of the time, a few simple steps can bring it back to life. The goal is to gently dry out any components that might have gotten wet and ensure everything is properly connected.
These steps are designed to be easy for anyone to follow, no matter their technical skill level. We’ll start with the most common and easiest fixes and move towards slightly more involved ones.
Step 1: Power Down and Battery Check
The very first thing to do when your Meat Thermometer Not Working After Washing is to take out the battery. This stops any immediate electrical activity that could cause damage from residual moisture. Open the battery compartment and remove the battery (or batteries).
Once the battery is out, inspect the compartment and the battery itself for any signs of moisture or corrosion. If you see any dampness, gently dab it dry with a soft, lint-free cloth or a cotton swab. If the battery looks corroded (often a powdery white or green substance), clean the contacts on both the battery and inside the compartment with a pencil eraser or a soft cloth.
A little bit of rubbing alcohol on a cotton swab can also help clean corrosion, but make sure it dries completely.
After cleaning, let the battery compartment air dry for at least 30 minutes to an hour. You can even place it in a bowl of uncooked rice overnight, as rice is excellent at absorbing moisture.
Step 2: Drying the Exterior and Probe
While the battery compartment is drying, focus on the rest of the thermometer. Gently wipe down the entire exterior with a dry, soft cloth. Pay special attention to the area where the probe meets the handle, as this is a common entry point for water.
For the probe itself, if it feels damp, carefully wipe it dry. Avoid using harsh chemicals or abrasive materials, as these can scratch the probe or damage any coatings. If you suspect water might have gotten inside the probe mechanism (which is rare but possible in cheaper models), let it air dry completely with the probe pointing downwards.
A good method for drying is to place the thermometer in a dry, well-ventilated area. You could also place it in a sealed container with a desiccant pack (like those found in shoe boxes or electronics packaging) to help draw out any lingering moisture.
Step 3: Reassemble and Test
Once you’re confident that the battery compartment and the thermometer exterior are completely dry, it’s time to put it back together. Insert the battery (or batteries) back into the compartment, making sure they are oriented correctly according to the markings. Close the battery compartment securely.
Now, try turning the thermometer on. If it powers up, great! Next, test its functionality.
You can do this by placing the probe in a cup of warm (not boiling) water. The temperature should rise quickly and display a reading. If the reading seems stable and accurate for warm water, it’s likely working correctly.
If it still doesn’t turn on or shows an error message, don’t worry. There are more steps you can try. Sometimes, a stubborn Meat Thermometer Not Working After Washing issue requires a bit more patience.
Step 4: The “Rice Trick” for Deeper Drying
If the initial drying steps didn’t work, it might mean more moisture has seeped into the internal components. The “rice trick” is a well-known method for absorbing moisture from electronic devices. Place the entire thermometer (if it doesn’t have exposed batteries) or just the handle part into a sealed bag or container filled with uncooked rice.
Make sure the rice completely surrounds the thermometer.
Leave it in the rice for at least 24 to 48 hours. The rice acts as a natural desiccant, drawing out any hidden moisture. After the waiting period, remove the thermometer, clean off any rice dust, and try turning it on again.
This method is often effective for electronics that have been exposed to more significant amounts of water.
Step 5: Checking the Probe Connection
Some meat thermometers have a detachable probe, while others have a fixed one. If your probe is detachable, try unplugging it and checking the connection ports on both the probe and the thermometer body. Look for any signs of moisture, dirt, or corrosion.
Gently clean these areas with a dry cloth or a cotton swab. Once clean and dry, reattach the probe firmly.
For fixed probes, as mentioned before, the area where the probe enters the handle is critical. If you suspect water has entered here, ensure this area is thoroughly dried. Sometimes, carefully using a very low-heat hairdryer from a distance can help, but be extremely cautious not to overheat the device.
Step 6: Consider a Reset (If Applicable)
Some advanced digital thermometers might have a reset button or a reset procedure. Check your thermometer’s manual to see if this is an option. A reset can sometimes clear internal errors caused by electrical disturbances, including those from moisture.
A common reset method involves holding down a specific button for a set amount of time or removing and reinserting the battery after a period of time.
When to Seek Professional Help or Replace
While most problems with a Meat Thermometer Not Working After Washing can be solved with simple drying and battery checks, there are times when the damage might be more significant. If you’ve tried all the troubleshooting steps and your thermometer still isn’t functioning, it might be time to consider other options. Understanding when to give up on a repair and move on to a replacement is also part of being a savvy home cook.
Signs of Permanent Damage
Sometimes, the tell-tale signs of permanent damage are visible. If you notice any corrosion that you can’t clean off, or if the display screen is permanently fogged up or shows strange symbols that don’t go away, it’s a strong indicator that the internal electronics have been compromised beyond simple drying.
Other signs include a probe that feels loose or wobbly, even after trying to secure it, or if the thermometer consistently gives wildly inaccurate readings even in controlled tests (like ice water or boiling water). If the casing itself is cracked, this is another point of entry for moisture that might have already caused internal issues.
Consulting the User Manual
Before you consider your thermometer a lost cause, always refer to the user manual. It’s a treasure trove of specific information for your exact model. The manual will often have a troubleshooting section that addresses common issues, including what to do if the device gets wet.
It might also have specific instructions for cleaning or maintenance that could help resolve your problem.
If your manual details a specific warranty period, and your thermometer is still within that time frame, contact the manufacturer. They may offer a repair or replacement if the damage is due to a manufacturing defect or if their warranty covers accidental water damage.
When It’s Time for a New Thermometer
If your thermometer is old, has been dropped multiple times, or if the damage from water seems extensive and unfixable, it might be more cost-effective and less frustrating to buy a new one. Modern meat thermometers are quite affordable, and newer models often come with improved water resistance and faster read times.
When choosing a new thermometer, look for features like a high degree of water resistance (check the IP rating if available), a durable stainless steel probe, and good reviews from other users. This will help you avoid the same problem down the line. For example, a thermometer with an IPX7 rating is submersible in water up to 1 meter for 30 minutes, which would significantly reduce the risk of damage from washing.
Example: Sarah bought a popular instant-read thermometer. After a few months, it stopped working after she washed it. She tried drying it, but it still wouldn’t turn on.
Her manual said it was water-resistant, not waterproof. She had tried rinsing the probe under the tap, and water must have gotten into the handle. She contacted the manufacturer, who informed her that water damage was not covered by the standard warranty.
Sarah decided to buy a new one, this time opting for a model specifically advertised as being more waterproof and reading customer reviews that praised its durability.
Preventative Measures for the Future
To avoid dealing with a Meat Thermometer Not Working After Washing in the future, make it a habit to clean your thermometer properly from the start. Always clean the probe immediately after use. Use a damp cloth or a soft sponge with a little mild soap, and then wipe it clean with a fresh damp cloth.
Crucially, never submerge the entire thermometer in water, especially the handle and display area.
After cleaning, always dry the probe and the handle thoroughly with a soft, dry cloth before storing it. Store it in a dry place, away from humidity or extreme temperatures. If your thermometer comes with a protective sheath or case, use it.
This adds an extra layer of protection for the probe and helps keep the device clean and dry.
Consider the type of thermometer you have. Some older dial thermometers are generally more water-resistant, but less precise than digital ones. If you’re prone to getting your digital thermometer wet, you might look for models that have a particularly robust seal around the probe connection.
A simple drip test might also be useful: hold the thermometer with the probe downwards and gently run water over the probe only, ensuring no water runs into the handle.
How Different Thermometer Types Handle Washing
Not all meat thermometers are created equal, and their ability to withstand washing varies greatly. Understanding the differences between them can help you choose the right tool for your kitchen and know how to care for it properly. This distinction is key when trying to figure out why a Meat Thermometer Not Working After Washing might be a problem for one type but not another.
Dial Thermometers
These are the classic, analog thermometers with a needle that points to the temperature. They work using a bimetallic strip that expands or contracts with heat. Because they have no batteries or electronic components, dial thermometers are generally very resilient to water.
You can typically wash the probe and even the face of a dial thermometer with soap and water. However, it’s still wise to avoid prolonged submersion. If water gets into the dial mechanism, it might cause the needle to stick or become cloudy.
Drying it thoroughly after washing is always recommended. Their simplicity is their strength when it comes to getting them wet.
Digital Instant-Read Thermometers
These are the most popular type today, offering quick and precise readings. As we’ve discussed, their Achilles’ heel is their electronic nature. Most are designed to be water-resistant, meaning they can handle splashes and you can wash the probe under a gentle stream of water, but they are NOT waterproof.
The handle and LCD screen are where water ingress is most problematic. If water gets into the seam between the probe and the handle, or through any button seals, it can short-circuit the internal components. This is why the Meat Thermometer Not Working After Washing is such a common issue with this type.
Always refer to the manufacturer’s guidelines for cleaning.
Leave-In Probe Thermometers (Wired)
These thermometers have a probe that stays in the food during cooking, connected by a wire to a base unit that sits outside the oven or grill. The probe itself is usually very durable and can be washed. However, the wire and the base unit are electronic and susceptible to water damage.
You can wash the probe as usual, but you must be extremely careful not to get the wire connection point or the base unit wet. Some base units are more weather-resistant than others, especially those designed for outdoor grilling. Always unplug the probe from the base before washing.
Smart Thermometers (Bluetooth/Wi-Fi)
These are advanced digital thermometers that connect to your smartphone or tablet. They offer features like remote monitoring and cooking timers. Like standard digital thermometers, they rely on electronics and are generally water-resistant, not waterproof.
The same precautions apply: keep the base unit and any connection points dry. While they offer incredible convenience, their complexity means they can be more sensitive to moisture. A Meat Thermometer Not Working After Washing can be particularly frustrating with these because of their higher cost and advanced features.
Comparison Table: Water Resistance in Thermometers
| Thermometer Type | Ease of Washing Probe | Risk of Water Damage to Electronics | Typical Cleaning Method |
|---|---|---|---|
| Dial Thermometer | High | Low (but avoid submersion) | Wipe clean or gentle rinse, dry thoroughly |
| Digital Instant-Read | Moderate (water-resistant, not waterproof) | High (especially handle/display) | Wipe probe with damp cloth, keep handle dry |
| Leave-In Probe (Wired) | High (probe only) | High (wire connection & base unit) | Wash probe, keep wire/base dry, unplug first |
| Smart Thermometer | Moderate (water-resistant, not waterproof) | High (base unit & connections) | Wipe clean with damp cloth, keep electronics dry |
As you can see, while the probe is usually designed to withstand heat and some cleaning, the electronic components are the vulnerable part when it comes to water. Always prioritize keeping the electronics dry.
Frequently Asked Questions
Question: Why does my digital meat thermometer show “Err” after I washed it?
Answer: The “Err” message usually means the thermometer has detected a problem, often an electrical issue. When a Meat Thermometer Not Working After Washing results in this message, it’s highly likely that moisture has gotten into the device and is interfering with the internal electronics or the probe signal. Try drying it thoroughly, especially the battery compartment and probe connection, and then reinserting the battery.
Question: Can I use a hairdryer to dry my meat thermometer?
Answer: You can, but only on a very low heat setting and from a distance. High heat can melt or warp plastic parts of the thermometer, causing more damage than good. Gentle air drying or using a desiccant like rice is generally safer.
Question: My meat thermometer was only slightly damp, but now it won’t turn on. What should I do?
Answer: Even a little moisture can cause issues. Remove the batteries immediately to prevent electrical shorts. Let the thermometer air dry in a warm, dry place for at least 24 hours, or use the rice trick.
Ensure the battery contacts are clean and dry before reinserting the batteries.
Question: Is it safe to use a meat thermometer if it smells like it got wet inside?
Answer: If you can smell moisture or a metallic odor (which might indicate corrosion), it’s best not to use it until you are absolutely sure it’s dry and functioning correctly. Continued use of a damp or corroded thermometer can lead to inaccurate readings or further damage to the electronics. Thorough drying is essential.
Question: How often should I replace my meat thermometer?
Answer: Meat thermometers don’t have a set expiration date, but they do wear out. If you notice it’s taking longer to get a reading, the display is dimming, or it’s consistently giving inaccurate temperatures even after troubleshooting, it’s probably time for a replacement. For digital thermometers, damage from washing can shorten their lifespan significantly.
Final Thoughts
When your Meat Thermometer Not Working After Washing, it’s usually due to moisture affecting the electronics. Simple steps like drying the battery compartment and letting the device air out can fix it. Always clean probes gently, avoid full submersion, and ensure it’s dry before storing.
Get your thermometer back to cooking perfectly!


