Chuck roast internal temperature guide knowledge is the single most important factor in cooking a tender, flavorful roast every time. This chuck roast internal temperature guide covers exact temperatures, resting times, and techniques to prevent dry or tough meat. Cooking beef chuck requires patience and precision because this cut contains heavy connective tissue that must break down slowly.
If you pull the meat too early, it stays chewy. Wait too long, and it dries out completely. Follow these steps to guarantee your family gets a melt-in-your-mouth dinner.
Simply put, the ideal target for a chuck roast is 195°F to 205°F for shredding. For slicing, aim for 160°F to 170°F. Always use a reliable digital meat thermometer to check the thickest part of the roast without touching bone or fat.
What Is the Ideal Chuck Roast Internal Temperature
The correct chuck roast internal temperature guide reading depends entirely on how you plan to serve the meat. A chuck roast comes from the shoulder of the cow, making it a heavily exercised muscle full of collagen. This collagen needs high heat over a long period to transform into gelatin.
If you want to slice the roast like a traditional pot roast, you need a lower final temperature. Slicing requires the meat to hold its shape, which happens between 160°F and 170°F. At this stage, the proteins have coagulated, but the collagen has not fully rendered.
For pulled beef or shredded tacos, you must push the temperature much higher. The sweet spot for shredding falls between 195°F and 205°F. At this range, the connective tissue melts completely, allowing you to pull the meat apart with two forks effortlessly.
- Slicing temperature range: 160°F to 170°F
- Shredding temperature range: 195°F to 205°F
- Minimum safe temperature according to USDA: 145°F with a rest
- Collagen breakdown starts at: 160°F
- Complete collagen rendering occurs at: 200°F
- Meat begins drying out rapidly past: 210°F
| Desired Texture | Target Temperature | Best Use |
|---|---|---|
| Firm and Sliceable | 160°F – 170°F | Traditional Pot Roast |
| Tender and Shreddable | 195°F – 205°F | Pulled Beef, Tacos |
| Falling Apart | 205°F – 210°F | Stews, Sandwiches |
Always match your target temperature to your recipe goals. Using this chuck roast internal temperature guide ensures you never guess again.
How to Measure Chuck Roast Internal Temperature Correctly
Getting an accurate reading requires more than just poking the meat randomly. You must place the probe in the exact right spot to get a true representation of the roast’s doneness. A flawed reading leads to undercooked or ruined meat.
Insert the thermometer probe into the thickest part of the chuck roast. Avoid hitting pockets of fat, gristle, or bone. Fat insulates heat differently than muscle, giving you a falsely high reading.
Bone conducts heat faster, also skewing your results.
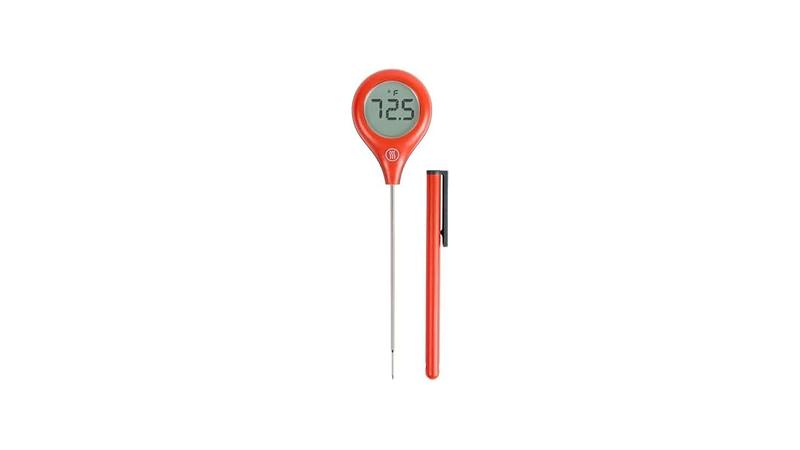
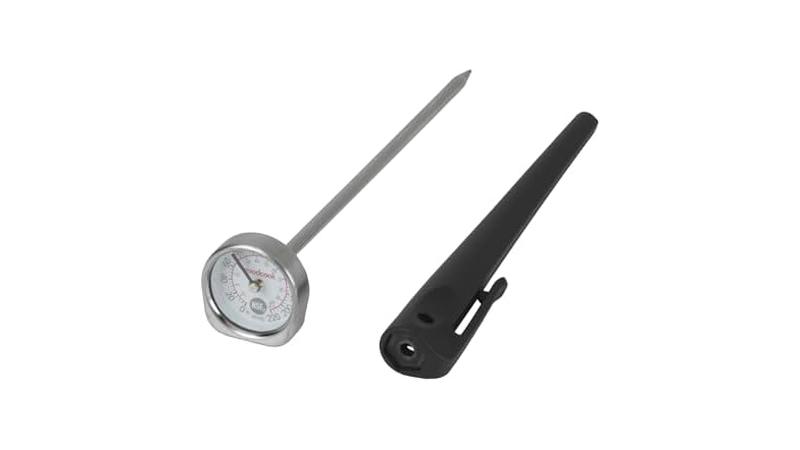
Digital instant-read thermometers provide the fastest and most accurate results. Brands like ThermoWorks and MEATER are trusted by professional chefs. Dial thermometers often lag behind and require frequent calibration to stay accurate.
- Remove the roast from the oven or smoker briefly if using an instant-read model.
- Locate the thickest center point of the meat visually.
- Insert the probe at an angle to reach the deep center.
- Push the probe past the center, then slowly pull it back to find the lowest temperature reading.
- Wait for the numbers to stabilize completely before removing the probe.
- Record the temperature and return the meat to the heat source if needed.
Warning: Never leave an instant-read thermometer inside the oven or smoker during the entire cook. The plastic components will melt, and the battery can fail under prolonged high heat.
Taking multiple readings in different spots helps confirm consistency. If one side reads 190°F and another reads 175°F, the roast needs more time or rotation. Even heating is crucial for a perfect result.
Why Collagen Breakdown Matters for Chuck Roast
Chuck roast is famous for its rich flavor, but that flavor comes with tough connective tissue. Collagen makes up a significant portion of this shoulder cut. Without proper heat application, collagen remains rubbery and unpleasant to chew.
When you apply low, slow heat, collagen undergoes a chemical transformation. It converts into gelatin, which coats the muscle fibers and creates that signature melt-in-your-mouth texture. This process cannot be rushed.
High heat squeezes moisture out of the muscle fibers before the collagen has time to melt.
According to the American Meat Science Association, collagen begins dissolving rapidly only after the meat sustains temperatures above 160°F for extended periods. Pushing the meat to 200°F guarantees maximum conversion. This science forms the backbone of any reliable chuck roast internal temperature guide.
- Collagen is a structural protein found in heavily worked muscles.
- Conversion to gelatin requires both high temperature and time.
- Gelatin traps moisture, keeping the roast juicy despite high heat.
- Cooking too fast leaves collagen intact and chewy.
- Braising liquids help facilitate the breakdown process.
- Marbling (intramuscular fat) renders alongside collagen for extra flavor.
Patience is your best tool here. A three-pound chuck roast might take four to six hours in a 275°F oven to reach the shredding stage. Trust the thermometer rather than the clock.
Time estimates vary wildly based on the animal, the specific cut size, and your oven’s true temperature.
Best Cooking Methods for Reaching Target Temperatures
Different cooking methods affect how quickly and evenly your chuck roast reaches its target temperature. Choosing the right method depends on your equipment, schedule, and desired crust or bark formation.
Braising in a Dutch oven remains the most popular technique. Submerging the bottom half of the roast in broth or wine creates a humid environment. Humidity prevents the exterior from drying out while the interior pushes past 195°F.
The liquid also infuses flavor directly into the meat fibers.
Smoking delivers incredible depth of flavor. Maintaining a smoker at 225°F to 250°F allows the meat to absorb smoke rings while slowly climbing toward 200°F. Many pitmasters wrap the roast in butcher paper once it hits 165°F to power through the stall phase.
| Cooking Method | Oven/Smoker Temp | Estimated Time (3-4 lbs) | Best For |
|---|---|---|---|
| Dutch Oven Braise | 300°F | 3 to 4 hours | Classic Pot Roast |
| Slow Cooker | Low setting (~200°F) | 8 to 10 hours | Hands-off Shredding |
| Smoker | 225°F to 250°F | 5 to 7 hours | BBQ Pulled Beef |
| Pressure Cooker | High Pressure | 60 to 90 minutes | Fast Weeknight Meals |
Each method achieves the same goal: breaking down collagen safely. Slow cookers excel at convenience, while smokers provide unmatched flavor complexity. Pick the approach that fits your timeline and stick to your thermometer readings.
Tip: Sear your chuck roast in a hot skillet with oil for two minutes per side before placing it in the oven or slow cooker. This Maillard reaction builds a deep flavor crust that boiling or braising alone cannot achieve.
How Does Resting Time Affect the Final Temperature
Pulling the roast off the heat does not stop the cooking process immediately. Carryover cooking causes the internal temperature to rise even after the meat leaves the oven or smoker. Failing to account for this leads to overcooked, dry beef.
When you remove a chuck roast from a 300°F environment, the outer layers are significantly hotter than the center. Heat naturally moves from the outside inward. This migration pushes the core temperature up by 5°F to 10°F during the resting phase.
To hit a perfect 200°F for shredding, pull the roast when your thermometer reads 190°F to 195°F. Let it rest tented loosely with aluminum foil. Tenting keeps the surface warm without trapping steam, which would ruin any crust you built.
- Carryover cooking adds 5°F to 10°F to the core temperature.
- Resting allows muscle fibers to relax and reabsorb juices.
- Cutting too early causes juices to spill out onto the board.
- A minimum rest time for large roasts is 20 to 30 minutes.
- Larger roasts retain heat longer and experience more carryover rise.
- Keep the meat in a warm spot away from drafts while resting.
The National Cattlemen’s Beef Association reports that properly rested meat retains up to 20% more moisture than meat sliced immediately after cooking. This statistic proves why resting is non-negotiable. Your chuck roast internal temperature guide strategy must include this vital step.
Use the resting time to finish side dishes or prepare gravy from the pan drippings. By the time everything else is ready, the roast will be at its absolute peak texture and juiciness.
Common Mistakes When Checking Chuck Roast Temperature
Even experienced home cooks make errors that ruin a perfectly good piece of meat. Avoiding these pitfalls saves money, time, and frustration. Most mistakes stem from rushing the process or trusting unreliable tools.
The biggest error is relying on cooking time instead of temperature. Recipes often state “cook for 4 hours,” but ovens vary drastically in accuracy. A roast in a poorly calibrated oven might need five hours or only three.
Only a thermometer tells the truth.
Another frequent mistake involves probing the wrong area. Hitting a fat cap gives a false reading because fat heats differently than lean muscle. Always aim for the dense, meaty center of the thickest section.
- Using cheap dial thermometers that lose calibration after a few uses.
- Opening the oven door too frequently, dropping ambient heat dramatically.
- Pulling the meat based on color rather than actual temperature readings.
- Ignoring the stall phase where evaporation halts temperature rise temporarily.
- Skipping the sear step, resulting in bland flavor despite perfect doneness.
- Not letting the thermometer stabilize before reading the display.
- Forgetting to account for carryover cooking during the rest period.
Important: The “stall” happens around 150°F to 170°F when smoking or roasting uncovered. Evaporative cooling matches the heat input, causing the temperature to plateau for hours. Do not panic and crank up the heat. Wrap the meat or simply wait it out.
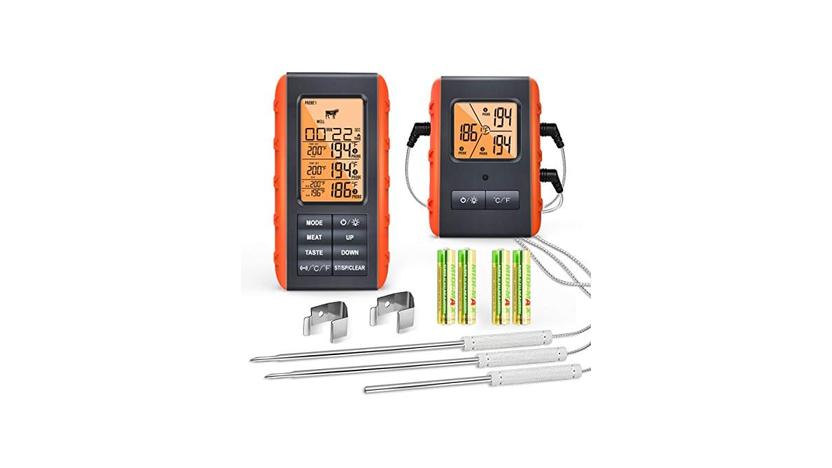
Investing in a quality dual-probe thermometer solves many of these issues. One probe stays in the meat while the other monitors the oven or smoker air temperature. This setup removes all guesswork from the equation.
What Are the USDA Safety Standards for Beef Roasts
Food safety must always come first when handling raw beef. The United States Department of Agriculture sets clear guidelines for safe consumption. Following these rules protects your family from foodborne illnesses like E.
coli and Salmonella.
The USDA recommends cooking whole cuts of beef to a minimum internal temperature of 145°F followed by a three-minute rest. However, this standard applies primarily to tender steaks and roasts meant to be served medium. Chuck roast behaves differently due to its toughness.
Cooking a chuck roast to only 145°F yields incredibly chewy, unpalatable meat. You technically meet safety standards, but the eating experience suffers greatly. To achieve tenderness, you must push well past the minimum safe zone into the 190°F+ range.
- USDA minimum safe temperature for whole beef cuts: 145°F
- Mandatory rest time after reaching 145°F: 3 minutes
- Ground beef minimum safe temperature: 160°F
- Danger zone for bacterial growth: 40°F to 140°F
- Do not leave raw or cooked meat in the danger zone for over two hours
- Always wash hands, boards, and utensils after handling raw chuck roast
Consumer Reports notes that digital thermometers reduce the risk of undercooking meat by over 60% compared to visual checks. Relying on the pinkness of the juice is outdated and unsafe. Stick to verified temperature data to ensure complete peace of mind.
Since chuck roast targets far exceed the 145°F baseline, you rarely face safety issues if you cook it for tenderness. Just ensure the meat passes through the danger zone quickly enough during the initial heating phase.
How to Adjust Temperatures for Different Chuck Roast Sizes
Not all chuck roasts weigh the same. A two-pound roast behaves very differently in the oven compared to a massive six-pound cut. Adjusting your expectations and techniques based on weight prevents disaster.
Smaller roasts heat through much faster. They also have a higher surface-area-to-volume ratio, meaning they lose moisture quicker if left too long. Monitor a two-pound roast closely starting at the two-hour mark to prevent overshooting your target.
Larger roasts take significantly longer to reach the center. The exterior might look done while the core sits stubbornly at 140°F. Low and slow cooking becomes even more critical for big cuts to ensure the outside does not burn before the inside tenderizes.
| Roast Weight | Approximate Time at 275°F | Checking Frequency |
|---|---|---|
| 2 to 3 pounds | 2.5 to 3.5 hours | Start checking at 2 hours |
| 4 to 5 pounds | 4 to 5.5 hours | Start checking at 3.5 hours |
| 6+ pounds | 6 to 8 hours | Start checking at 5 hours |
These times serve as rough estimates only. Your specific oven, the starting temperature of the meat, and whether you braise or roast dry all impact the final duration. Treat these numbers as planning tools, not strict rules.
Consider cutting very large roasts in half if your cooking vessel is too small. Crowding a Dutch oven lowers the ambient temperature and creates uneven cooking. Giving the meat space allows heat to circulate freely around every surface.
Always bring the meat to room temperature for about 30 to 45 minutes before cooking. Placing a fridge-cold roast directly into a hot oven shocks the exterior and delays the internal temperature climb unnecessarily.
Frequently Asked Questions
Can I eat chuck roast at 145 degrees?
Yes, 145°F meets USDA safety standards for whole beef cuts when followed by a three-minute rest. However, the meat will be extremely tough and chewy at this temperature. You need to cook it to at least 195°F to break down the collagen for a pleasant texture.
Why is my chuck roast still tough after hours of cooking?
Toughness usually means the internal temperature has not reached the collagen-melting zone yet. Check the thickest part with a thermometer. If it reads below 190°F, keep cooking.
Connective tissue requires sustained heat over time to convert into soft gelatin.
Should I cover my chuck roast while cooking?
Covering the roast traps moisture and speeds up the cooking process through braising. This method works best for achieving fall-apart tenderness. Leave it uncovered if you want a thick, crusty bark on the exterior, but expect a longer cook time.
How do I fix a dry chuck roast?
If you overcooked the roast past 210°F, the muscle fibers have squeezed out most of their moisture. Shred the meat finely and simmer it directly in gravy, barbecue sauce, or beef broth. The liquid will rehydrate the strands and mask the dryness effectively.
Does bone-in chuck roast cook faster than boneless?
Bone conducts heat, so the meat immediately surrounding the bone cooks slightly faster. However, the overall mass of a bone-in roast usually means the total cook time remains similar or slightly longer. Always rely on your thermometer rather than assuming bones speed up the entire process.
Final Thoughts
Following a reliable chuck roast internal temperature guide takes the guesswork out of cooking tough cuts. Aim for 195°F to 205°F for shredding, account for carryover cooking, and always use a quality digital thermometer. Master these basics, and you will produce incredibly tender, flavorful beef every single time.