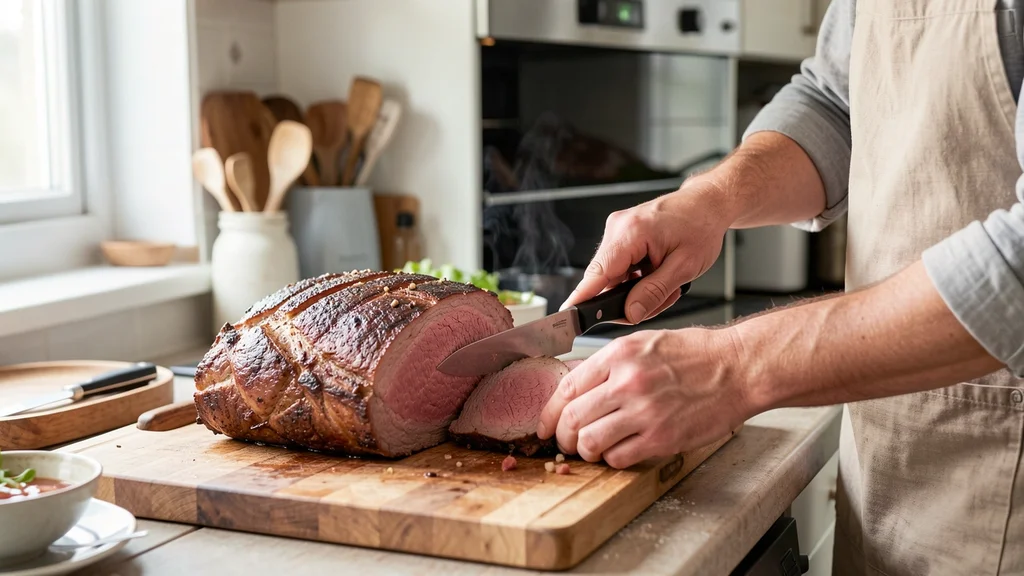
Roast Beef Internal Temperature Guide is the most reliable resource you need before firing up your oven. Cooking beef without a thermometer leads to dry, overcooked meat or dangerous undercooked centers. This Roast Beef Internal Temperature Guide covers exact heat levels for every doneness preference, from rare to well done.
You will learn how to use a meat thermometer correctly, when to pull your roast out of the oven, and why resting time matters just as much as cooking time. Follow these steps to serve tender, juicy beef every single time.
Simply put, this Roast Beef Internal Temperature Guide recommends pulling your roast at 135°F for medium-rare and letting it rest for 15 minutes. The temperature will rise 5 to 10 degrees during resting, giving you perfectly cooked, safe, and juicy beef.
What Is the Ideal Roast Beef Internal Temperature Guide Range
The ideal range in any Roast Beef Internal Temperature Guide depends entirely on your preferred level of doneness. Different temperatures change the texture, color, and moisture content of the beef significantly. Knowing these ranges helps you control the final result rather than guessing by cooking time alone.
The United States Department of Agriculture (USDA) recommends cooking whole cuts of beef to a minimum internal temperature of 145°F followed by a three-minute rest period. However, many chefs and home cooks prefer lower temperatures for specific cuts like prime rib or tenderloin to maintain maximum juiciness.
Using a reliable meat thermometer is the only way to guarantee accuracy. Visual cues like color can be misleading due to lighting, myoglobin reactions, and the age of the animal. Always trust the numbers over your eyes when dealing with food safety and quality.
- Rare: 120°F to 125°F – bright red center, very soft texture
- Medium-Rare: 130°F to 135°F – warm red center, tender and juicy
- Medium: 140°F to 145°F – pink center, slightly firmer bite
- Medium-Well: 150°F to 155°F – slight hint of pink, firm texture
- Well Done: 160°F and above – no pink, fully firm and drier
- USDA Minimum Safe Temperature: 145°F with a 3-minute rest
- Chef Recommended Pull Temperature: 5 to 10 degrees below target
| Doneness Level | Pull Temperature | Final Rested Temperature |
|---|---|---|
| Rare | 115°F – 120°F | 120°F – 125°F |
| Medium-Rare | 125°F – 130°F | 130°F – 135°F |
| Medium | 135°F – 140°F | 140°F – 145°F |
| Medium-Well | 145°F – 150°F | 150°F – 155°F |
| Well Done | 155°F+ | 160°F+ |
This table serves as your quick reference for the Roast Beef Internal Temperature Guide. Always pull the meat early because carryover cooking will push the temperature higher while it rests on the counter.
How to Use a Meat Thermometer for Roast Beef
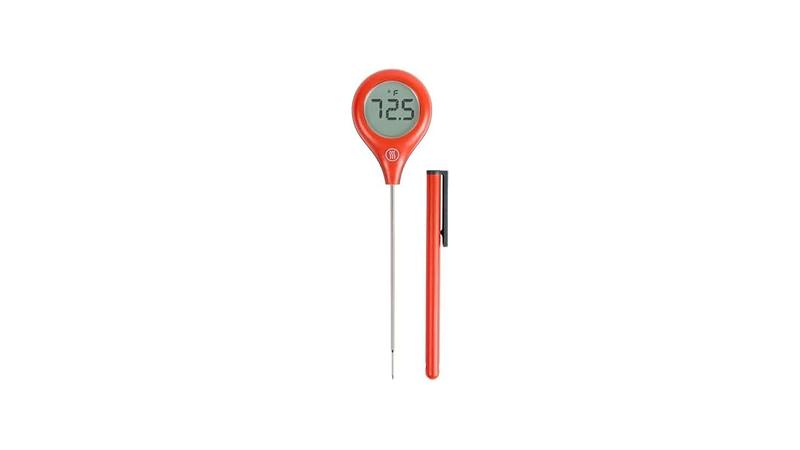
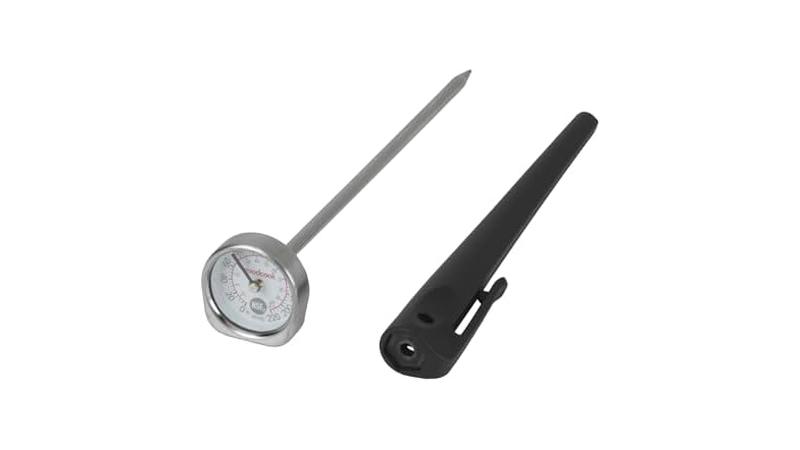
A digital instant-read thermometer or a leave-in probe thermometer makes all the difference. These tools eliminate guesswork and protect your expensive cut of beef from overcooking. Brands like ThermoWorks and OXO manufacture highly accurate models trusted by professional kitchens worldwide.
Insert the probe into the thickest part of the roast. Avoid touching bone, large pockets of fat, or the roasting pan itself. Bone conducts heat differently than muscle tissue and will give you a false reading that could ruin your dinner plans.
If you are cooking a tied roast, aim for the geometric center. This spot takes the longest to heat up and represents the lowest temperature inside the meat. Hitting your target here means the entire roast has reached at least that level of doneness.
- Turn on your digital thermometer and calibrate it using ice water if needed.
- Insert the probe tip into the thickest center section of the raw roast before cooking.
- Set your target alarm for 5 to 10 degrees below your desired final temperature.
- Place the roast in the preheated oven and close the door quickly to retain heat.
- Monitor the rising temperature without opening the oven door repeatedly.
- Pull the roast immediately when the alarm sounds to prevent overcooking.
- Clean the probe with hot soapy water after every single use to prevent cross-contamination.
Warning: Never rely on pop-up timers that come pre-inserted in some grocery store roasts. According to consumer testing reports, these plastic devices often trigger at 165°F or higher, resulting in severely overcooked, dry beef. Always use your own calibrated digital thermometer.
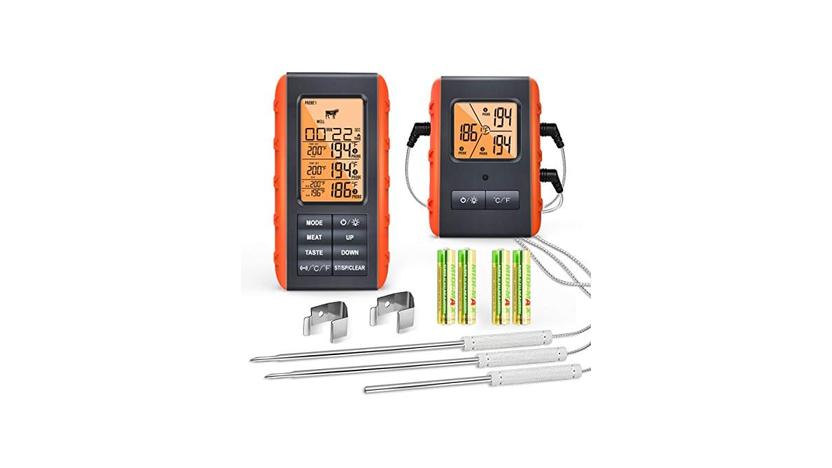
Leave-in probe thermometers connect to a base unit outside the oven via a heat-resistant cable. This setup allows you to monitor the internal temperature without losing oven heat by constantly opening the door. Every time you open the oven, the temperature drops by 25 to 50 degrees.
Why Carryover Cooking Changes Your Final Temperature
Carryover cooking happens because the outer layers of the roast get hotter than the center during roasting. When you remove the beef from the oven, that trapped heat continues moving inward. This thermal momentum raises the core temperature even though the heat source is gone.
The amount of temperature rise depends on the size and shape of the meat. A massive 10-pound prime rib will experience more carryover cooking than a small 2-pound tenderloin. Dense, thick cuts hold more residual heat energy in their outer layers.
Oven temperature also plays a major role. Roasting at high heat creates a larger temperature gradient between the surface and the center. This steep gradient drives more heat inward during the resting phase compared to slow-roasting methods.
- Small roasts under 3 pounds typically rise 5°F during resting.
- Medium roasts between 3 and 6 pounds usually rise 5°F to 10°F.
- Large roasts over 6 pounds can rise 10°F to 15°F easily.
- High-heat searing methods increase the total carryover effect significantly.
- Low-and-slow smoking or roasting reduces the temperature jump.
- Tenting loosely with foil traps some heat but prevents the crust from steaming.
According to America’s Test Kitchen, failing to account for carryover cooking is the number one reason home cooks end up with medium-well beef when they aimed for medium-rare. Planning your pull temperature around this science guarantees better results every time.
Important: If your recipe calls for medium-rare at 135°F, you must pull the roast from the oven at 125°F to 130°F. Letting it reach 135°F inside the oven means it will climb to 140°F or 145°F while resting, pushing it into medium territory.
How Does the Cut of Beef Affect Target Temperatures
Different cuts contain varying amounts of collagen, intramuscular fat, and connective tissue. These structural differences mean that a single temperature does not work perfectly for every type of roast. Matching the cut to the right heat level ensures optimal tenderness.
Lean cuts like beef tenderloin or eye of round have very little fat marbling. They dry out rapidly if pushed past medium doneness. You should cook these cuts to medium-rare at most to preserve their delicate, melt-in-your-mouth texture.
Fatty, heavily marbled cuts like prime rib or chuck roast behave differently. The intramuscular fat needs enough heat to render properly. Chuck roast actually requires much higher temperatures, often above 195°F, to break down tough collagen into soft gelatin for braised dishes.
| Beef Cut | Fat Content | Best Doneness | Target Temp |
|---|---|---|---|
| Tenderloin | Very Lean | Rare to Medium-Rare | 125°F – 135°F |
| Prime Rib | High Marbling | Medium-Rare | 130°F – 135°F |
| Top Sirloin | Moderate | Medium-Rare to Medium | 135°F – 145°F |
| Eye of Round | Very Lean | Medium-Rare | 130°F – 135°F |
| Chuck Roast | High Connective Tissue | Braised / Shredded | 195°F – 205°F |
Referencing this chart alongside your Roast Beef Internal Temperature Guide ensures you treat each cut appropriately. A top sirloin offers great flavor at medium, but an eye of round turns into shoe leather if cooked that far.
The National Cattlemen’s Beef Association reports that consumers waste millions of dollars annually by overcooking premium cuts. Treating a tenderloin like a chuck roast destroys its value. Always match your cooking method and target temperature to the specific anatomy of the meat.
What Are the Best Oven Methods for Even Cooking
How you manage your oven heat dictates how evenly the beef cooks from edge to center. Uneven heat causes the outer layers to overcook while the middle stays dangerously raw. Choosing the right roasting strategy solves this problem completely.
The reverse sear method works exceptionally well for thick roasts. You start the beef in a low oven, usually around 225°F to 250°F, until it reaches about 10 degrees below your target. Then you blast it in a 500°F oven for a few minutes to build a brown crust.
Traditional high-to-low roasting starts with a 450°F sear for 15 minutes, then drops the heat to 325°F for the remainder. This builds the crust early but creates a thicker band of gray, overcooked meat just beneath the surface compared to the reverse sear.
- Reverse Sear: Low heat first, high heat finish, extremely even edge-to-edge doneness.
- High-to-Low: High heat sear first, low heat finish, traditional crust formation.
- Constant Heat: Maintaining 325°F throughout, predictable timing but less crust.
- Sous Vide Finish: Water bath to exact temp, then a quick pan or torch sear.
- Convection Roasting: Uses a fan to circulate air, cooks roughly 25% faster.
- Spatchcock Style: Not for beef, but butterflying smaller roasts speeds up cooking.
According to Serious Eats culinary testing, the reverse sear method produces the most uniform pink color from edge to edge. It minimizes the gray band of overcooked protein that plagues traditional roasting techniques. This method requires patience but delivers superior texture.
Tip: If you use a convection oven setting, reduce your expected cooking time by about 25%. Convection fans blow hot air directly onto the meat surface, accelerating heat transfer. Rely strictly on your thermometer rather than the clock when using convection mode.
Always place your roast on a wire rack set inside a rimmed baking sheet. Elevating the meat allows hot air to circulate underneath. Setting a roast directly on a flat pan causes the bottom to steam in its own juices rather than roast properly.
How Long Should You Rest Roast Beef Before Carving
Resting is not optional. It is a mandatory step that determines whether your beef retains its juices or bleeds them out across the cutting board. Skipping the rest ruins even a perfectly cooked roast instantly.
During cooking, intense heat forces moisture toward the center of the meat. Muscle fibers contract tightly and squeeze out liquid. When you stop applying heat, those fibers slowly relax and reabsorb the displaced juices back throughout the entire cut.
If you slice the roast immediately after pulling it from the oven, the pressurized juices rush out through the fresh cuts. You lose flavor, moisture, and tenderness in seconds. A proper rest locks that liquid inside the muscle structure where it belongs.
- Remove the roast from the oven once it hits your calculated pull temperature.
- Transfer the meat to a warm cutting board or serving platter immediately.
- Tent the roast very loosely with aluminum foil to keep surface heat in.
- Do not wrap the foil tightly, or you will steam away your hard-earned crust.
- Wait at least 15 minutes for small roasts and 30 minutes for large prime ribs.
- Check the temperature one final time before carving to confirm it hit your target.
- Slice against the grain using a long, sharp carving knife for maximum tenderness.
The Food Network suggests resting large holiday roasts for up to 45 minutes. The internal temperature will stabilize, and the meat will become noticeably easier to carve cleanly. Warm plates help keep the sliced portions hot during service.
Keep in mind that the crust might soften slightly during resting. This trade-off is worth it for the massive improvement in interior juiciness. You can always flash the sliced pieces under a broiler for 30 seconds if you crave extra crunch.
Common Mistakes That Ruin Roast Beef Temperatures
Even experienced cooks make errors that lead to disappointing results. Most of these mistakes stem from ignoring basic thermodynamics or relying on outdated cooking myths. Fixing these habits will transform your weekly dinners immediately.
Guessing doneness by squeezing the meat or comparing it to the fleshy part of your hand is wildly inaccurate. Every cut feels different based on its fat content, thickness, and age. Only a calibrated digital thermometer provides objective truth about internal heat.
Cooking straight from the refrigerator shocks the meat. A cold center takes much longer to heat up, causing the exterior to overcook before the middle reaches a safe temperature. Bringing the roast to room temperature first promotes even cooking throughout.
- Skipping the room temperature rest before roasting leads to uneven doneness gradients.
- Opening the oven door every five minutes dumps significant heat and extends cooking time.
- Placing the thermometer probe too close to the surface gives falsely high readings.
- Ignoring the specific cut type and treating all roasts with identical temperature targets.
- Carving the meat immediately out of the oven drains all the natural juices.
- Using dull knives tears the muscle fibers instead of slicing them cleanly.
- Failing to calibrate your thermometer periodically results in drifting accuracy over time.
The USDA notes that foodborne illness risks increase significantly when beef is held in the danger zone between 40°F and 140°F for extended periods. Proper temperature management keeps your family safe while delivering restaurant-quality meals at home.
Warning: Never partially cook a roast, let it cool, and finish it later. This practice breeds dangerous bacteria rapidly. Cook the beef completely in one session, rest it properly, and refrigerate any leftovers within two hours of serving.
Another frequent error involves overcrowding the roasting pan. If you surround the beef with dense vegetables, they block airflow and create steam pockets. Roast your root vegetables separately or arrange them in a single layer far away from the meat itself.
Food Safety Standards for Cooking Beef at Home
Food safety should never take a back seat to culinary preferences. Pathogens like E. coli and Salmonella live primarily on the exterior surface of whole muscle cuts.
This fact explains why a rare steak is generally safe while rare ground beef poses serious health risks.
When you sear the outside of a whole roast, you kill surface bacteria effectively. The interior remains largely sterile unless the meat was mechanically tenderized with needles. Needle-tenderized beef pushes surface bacteria deep inside, requiring higher minimum cooking temperatures for safety.
Always check the packaging label to see if your roast underwent mechanical tenderization. If it did, the USDA advises cooking it to a minimum of 145°F regardless of your preference for rarer meat. This rule protects vulnerable individuals from severe illness.
- Whole intact muscle cuts: Safe at 145°F with a 3-minute rest period.
- Mechanically tenderized beef: Must reach 145°F minimum internally for safety.
- Ground beef products: Require 160°F throughout because bacteria mix into the center.
- Leftover roast beef: Reheat to 165°F before consuming again to eliminate new bacterial growth.
- Storage timeline: Refrigerate cooked roast beef within two hours and consume within four days.
- Freezing guidelines: Wrap tightly in freezer paper to prevent burn for up to three months.
The Centers for Disease Control and Prevention (CDC) estimates that millions of Americans suffer from food poisoning annually. Following established temperature guidelines drastically reduces your household risk. Treat your Roast Beef Internal Temperature Guide as both a culinary tool and a safety manual.
Invest in a secondary thermometer to verify your primary device. Ice water calibration tests take less than a minute. Fill a glass with crushed ice and water, insert the probe, and ensure it reads exactly 32°F.
Adjust the calibration nut if it drifts.
Frequently Asked Questions
What temperature should I pull my roast beef for medium-rare?
You should pull your roast beef from the oven when the thermometer reads 125°F to 130°F. During the resting period, carryover cooking will raise the internal temperature by 5 to 10 degrees. This brings the final temperature to the perfect medium-rare range of 130°F to 135°F.
Can I eat roast beef cooked below 145 degrees safely?
The USDA officially recommends 145°F with a three-minute rest for whole cuts of beef. Many restaurants and home cooks safely consume beef at lower temperatures like 130°F for medium-rare. Ensure you buy intact, non-mechanically tenderized cuts from reputable sources to minimize bacterial risks.
How do I fix a roast beef that is undercooked in the center?
If you slice into your roast and find the center too raw, simply return the pieces to a 350°F oven. Place the slices in a baking dish with a splash of beef broth and cover tightly with foil. Check the temperature every five minutes until it reaches your desired doneness.
Does the bone affect the internal temperature reading of a roast?
Yes, bones conduct heat differently than muscle tissue and can give false readings. Always insert your thermometer probe into the thickest part of the meat while avoiding contact with any bones. Touching the bone might show a temperature several degrees higher or lower than the actual meat.
Why does my roast beef look brown but still read a low temperature?
Meat color is an unreliable indicator of doneness due to chemical reactions involving myoglobin. Factors like pH levels, aging, and exposure to oxygen can cause beef to turn brown prematurely. Always trust your calibrated digital thermometer over visual color cues when determining if your roast is finished.
Final Thoughts
Following a reliable Roast Beef Internal Temperature Guide removes the stress from cooking expensive cuts of meat. Remember to account for carryover cooking, rest your roast adequately, and always verify temperatures with a calibrated digital thermometer. Master these simple principles, and you will serve flawless, juicy beef at every meal.