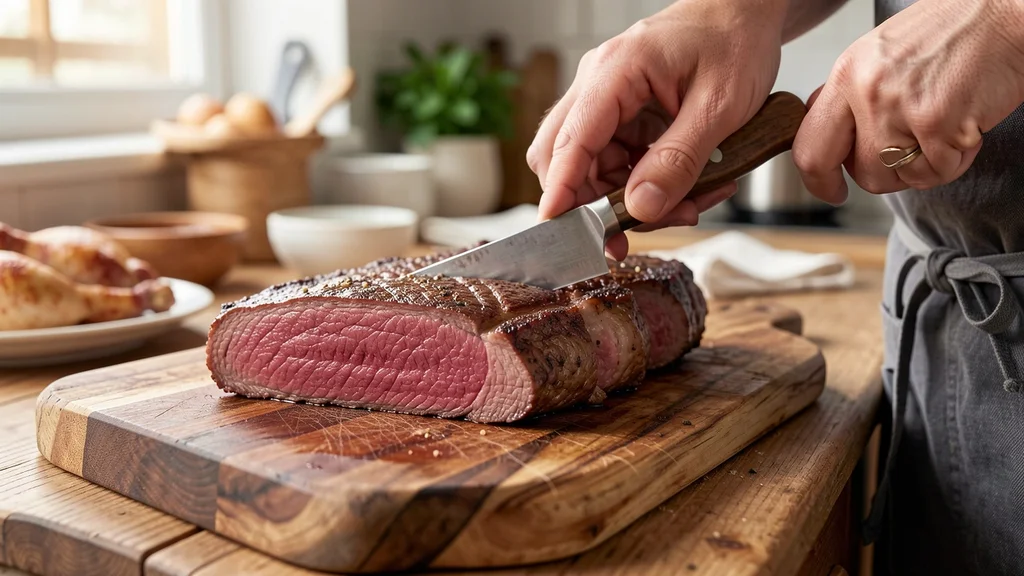
A reliable meat doneness temperature chart: rare to well done helps you cook perfect protein every single time. Guessing when your steak or chicken is ready leads to dry, overcooked meals or dangerous undercooked food. This guide gives you exact internal temperatures for beef, pork, poultry, and lamb so you never ruin dinner again.
You will learn how to use a meat thermometer correctly, what carryover cooking means, and why resting your meat matters. The United States Department of Agriculture sets specific safety guidelines that every home cook should follow. Whether you grill, roast, or pan-sear, knowing these numbers changes everything.
Keep this meat doneness temperature chart: rare to well done handy in your kitchen.
Simply put, a meat doneness temperature chart: rare to well done provides exact internal temperatures for various proteins. Beef ranges from 120°F for rare to 160°F for well done. Poultry always requires 165°F for safety. Using a digital instant-read thermometer guarantees accurate results every time you cook.
What Is a Meat Doneness Temperature Chart?
A meat doneness temperature chart: rare to well done is a reference tool that lists the exact internal temperatures required to achieve specific levels of doneness in various meats. These charts cover everything from a cool red center in a rare steak to a fully cooked, firm piece of well-done beef. Home cooks and professional chefs rely on these numbers to deliver consistent results without cutting into the meat and losing valuable juices.
The science behind these charts relates to how heat affects muscle proteins. As meat heats up, proteins denature and squeeze out moisture. Different temperatures create different textures and colors.
According to the USDA Food Safety and Inspection Service, ground meats require higher temperatures than whole cuts because grinding distributes surface bacteria throughout the product.
Using a proper chart eliminates guesswork. You stop relying on touch tests or color alone, which often mislead cooks. Instead, you measure the actual thermal state of the food.
- Rare meat retains maximum moisture and has a soft texture
- Medium-rare offers a warm red center with excellent tenderness
- Medium provides a pink center with slightly firmer texture
- Medium-well shows only a hint of pink and feels quite firm
- Well-done meat contains no pink and has the firmest texture
- Poultry must always reach safe minimums regardless of preference
- Ground meats need higher heat than intact whole muscle cuts
These temperature targets apply to standard cooking methods like grilling, roasting, and pan-frying. Sous vide cooking uses the same principles but holds the meat at the target temperature for extended periods to ensure pasteurization.
How to Read the Meat Doneness Temperature Chart for Beef
Beef is where most people search for a meat doneness temperature chart: rare to well done. Steaks and roasts offer the widest range of acceptable doneness levels. Your personal preference dictates the final temperature, but knowing the exact numbers ensures you hit your target consistently.
The National Cattlemen’s Beef Association reports that medium-rare remains the most popular doneness level among American consumers. This preference makes sense because medium-rare balances flavor, tenderness, and juiciness better than any other stage.
| Doneness Level | Internal Temperature | Center Color | Texture |
|---|---|---|---|
| Rare | 120°F – 125°F | Cool Red | Very Soft |
| Medium-Rare | 130°F – 135°F | Warm Red | Soft |
| Medium | 140°F – 145°F | Warm Pink | Firm |
| Medium-Well | 150°F – 155°F | Slight Pink | Very Firm |
| Well Done | 160°F+ | Brown/Gray | Hard |
This table serves as your primary meat doneness temperature chart: rare to well done reference for steaks and roasts. Always pull the beef off the heat about five degrees before your target temperature to account for carryover cooking.
Different cuts respond differently to heat. A fatty ribeye handles medium-rare beautifully, while a lean filet mignon dries out fast if pushed past medium. Tougher cuts like chuck roast require completely different approaches, usually involving low-and-slow braising until collagen breaks down around 200°F.
- Select your preferred doneness level from the chart above
- Remove the beef from heat five degrees below your target
- Let the meat rest on a warm cutting board for five to ten minutes
- Slice against the grain to maximize perceived tenderness
- Serve immediately after resting for optimal flavor and texture
Why Pork and Poultry Temperatures Differ From Beef
You cannot treat all proteins the same way when using a meat doneness temperature chart: rare to well done. Poultry carries different bacterial risks than beef. Salmonella and Campylobacter commonly contaminate chicken and turkey, requiring thorough cooking to eliminate these pathogens completely.
The USDA mandates that all poultry reaches an internal temperature of 165°F. At this temperature, harmful bacteria die almost instantly. Cooking dark meat to 175°F actually improves texture because the extra heat breaks down tough connective tissues in the thighs and drumsticks.
Pork used to require cooking to 160°F due to trichinosis concerns. Modern farming practices have virtually eliminated this parasite in commercial pork. The USDA lowered the safe cooking temperature for whole pork cuts to 145°F followed by a three-minute rest period back in 2011.
This change revolutionized how people cook pork chops and tenderloins.
| Protein Type | Safe Minimum Temperature | Required Rest Time |
|---|---|---|
| Whole Chicken/Turkey | 165°F | None required |
| Ground Poultry | 165°F | None required |
| Pork Chops/Roasts | 145°F | 3 minutes |
| Ground Pork | 160°F | None required |
| Lamb Cuts | 145°F | 3 minutes |
| Ground Lamb/Beef | 160°F | None required |
This comparison highlights why treating all meats equally creates problems. Ground meats always demand higher temperatures because the grinding process introduces surface bacteria into the interior of the product. Whole muscle cuts remain sterile inside, allowing lower safe temperatures.
Warning: Never serve poultry or ground meats rare or medium-rare. These products must reach their safe minimum internal temperatures to prevent foodborne illness. Always verify with a calibrated thermometer.
How to Use a Meat Thermometer Correctly
Your meat doneness temperature chart: rare to well done is useless without proper thermometer technique. Many home cooks get inaccurate readings because they place the probe incorrectly or use the wrong type of thermometer. Getting this right separates restaurant-quality meals from disappointing dinners.
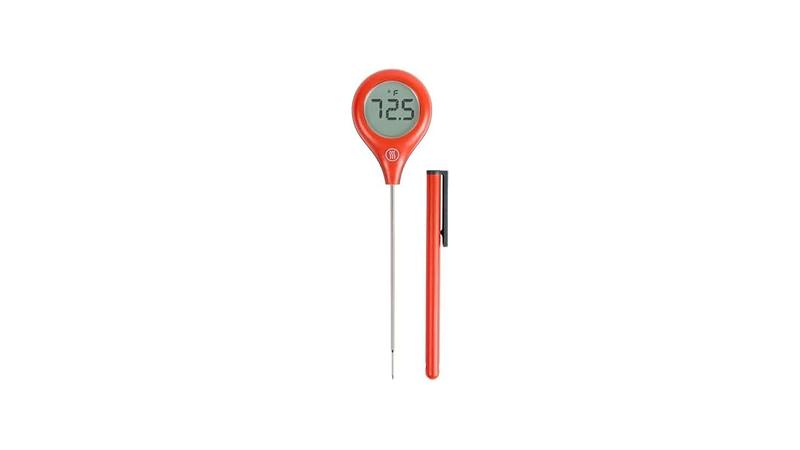
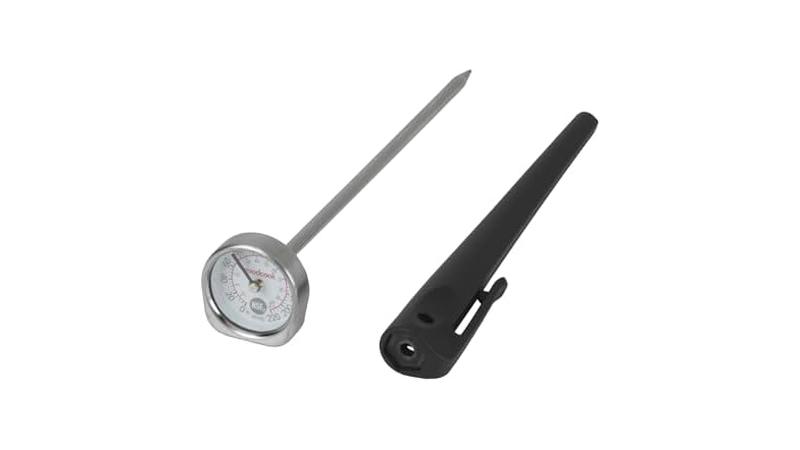
Digital instant-read thermometers provide the fastest and most accurate results. Brands like ThermoWorks produce probes that register temperatures in two to three seconds. Dial thermometers take much longer and often drift out of calibration over time.
Invest in a quality digital model for reliable readings.
Probe placement matters more than anything else. You must insert the thermometer tip into the thickest part of the meat, avoiding bones, fat pockets, and gristle. Bones conduct heat differently than muscle tissue and give false high readings.
Fat insulates and gives false low readings.
- Insert the probe into the geometric center of the thickest section
- Avoid touching bone, cartilage, or large fat deposits
- Check multiple spots in irregularly shaped roasts or whole birds
- For thin cuts like burgers, insert the probe sideways through the edge
- Calibrate your thermometer regularly using ice water (should read 32°F)
- Clean the probe with hot soapy water between checking raw and cooked items
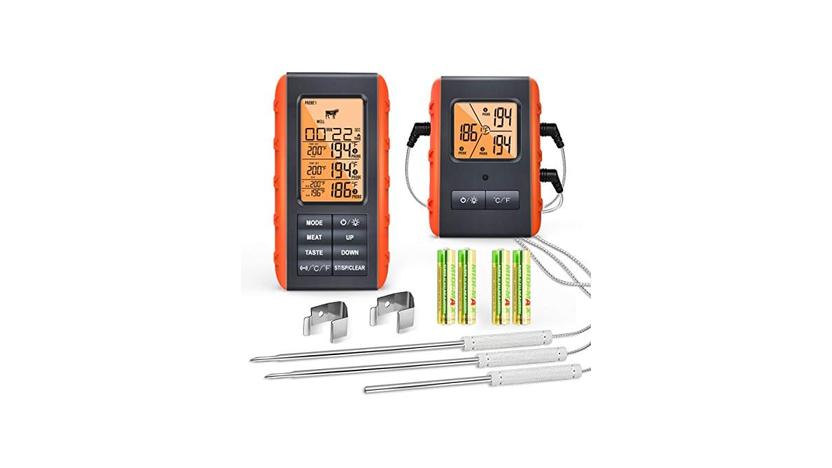
- Leave-in probe thermometers work well for large roasts and smokers
According to the Food and Drug Administration, roughly 48 million Americans suffer from foodborne illnesses annually. Proper temperature monitoring prevents a significant portion of these cases. Taking two extra seconds to check your food protects your family.
- Turn on your digital thermometer and wait for it to zero out
- Open the grill or oven briefly to minimize heat loss
- Insert the probe tip into the thickest part of the protein
- Wait for the reading to stabilize, usually two to four seconds
- Compare the number to your meat doneness temperature chart: rare to well done
- Remove the meat if it is five degrees below your target
- Wipe the probe clean before storing it safely
What Does Carryover Cooking Mean for Your Meat?
Carryover cooking is the phenomenon where meat continues to rise in temperature after you remove it from the heat source. This happens because the outer layers hold more thermal energy than the center. That stored heat migrates inward, pushing the core temperature higher even as the exterior cools down.
Understanding carryover cooking transforms how you use a meat doneness temperature chart: rare to well done. If you wait until your steak hits exactly 135°F on the grill before pulling it off, the center will climb to 140°F or higher during resting. You end up with medium instead of medium-rare.
The amount of temperature rise depends on several factors. Larger cuts experience more carryover cooking than small ones. A massive prime rib might jump ten to fifteen degrees after leaving the oven.
A thin skirt steak might only rise two or three degrees. High cooking temperatures also increase the carryover effect compared to gentle, low-heat methods.
| Cut Size | Expected Temp Rise | When to Pull Off Heat |
|---|---|---|
| Thin steaks (under 1 inch) | 2°F – 3°F | 2 degrees below target |
| Thick steaks (1.5+ inches) | 5°F – 7°F | 5 degrees below target |
| Small roasts (3-5 lbs) | 5°F – 10°F | 7 degrees below target |
| Large roasts (10+ lbs) | 10°F – 15°F | 10 degrees below target |
| Whole poultry | 5°F – 10°F | 5 degrees below target |
This table helps you plan your removal timing accurately. Always err on the side of pulling the meat early rather than late. You can always return undercooked meat to the heat, but you cannot reverse overcooked protein.
Tip: Tent large roasts loosely with aluminum foil during the resting period. This slows down surface cooling while still allowing steam to escape. Do not wrap tightly, as trapped steam softens your carefully developed crust.
Why Resting Meat Matters After Cooking
Resting meat allows muscle fibers to relax and reabsorb expelled juices. When heat hits protein, the fibers contract violently and push moisture toward the center. Cutting into meat immediately causes those pooled juices to flood onto your cutting board instead of staying inside each bite.
The resting period works hand-in-hand with your meat doneness temperature chart: rare to well done knowledge. During rest, carryover cooking finishes bringing the center to its target temperature while the juices redistribute evenly throughout the cut. Skipping this step ruins even perfectly cooked meat.
How long you rest depends entirely on the size of the protein. A standard one-inch steak needs about five minutes. A large holiday turkey requires thirty to forty-five minutes.
Rushing the process defeats the purpose completely.
- Steaks and chops need five to ten minutes of resting time
- Whole chickens benefit from fifteen to twenty minutes of rest
- Large roasts require twenty to forty-five minutes depending on mass
- Place meat on a warm plate or cutting board, not a cold surface
- Do not cover steaks tightly or the crust turns soggy
- Juices that pool on the board can be spooned back over sliced meat
- Resting improves both moisture retention and overall tenderness significantly
A study published by America’s Test Kitchen demonstrated that rested steaks lost roughly 40% less juice during slicing compared to steaks cut immediately off the grill. That difference translates directly to a better eating experience. Patience pays off every single time.
Professional kitchens build resting time into their service flow. Line cooks pull proteins early, let them rest on heated shelves, and fire them for final plating when orders come in. Home cooks should adopt this same disciplined approach for better weeknight dinners.
Common Mistakes People Make With Meat Temperatures
Even experienced cooks make errors when referencing a meat doneness temperature chart: rare to well done. These mistakes lead to inconsistent results, wasted expensive ingredients, and potential health risks. Identifying bad habits helps you correct them quickly.
The biggest error involves trusting visual cues over actual measurements. Color changes in meat do not reliably indicate doneness. Factors like pH levels, lighting conditions, and packaging gases alter how cooked meat looks.
A burger might appear brown in the middle while still sitting at a dangerous 140°F internally.
Another frequent problem stems from using cheap or uncalibrated thermometers. Inaccurate tools give you false confidence. If your thermometer reads ten degrees low, you serve undercooked food thinking it is safe.
Regular calibration solves this issue completely.
- Checking temperature too close to the bone instead of the center
- Ignoring carryover cooking and overshooting the target temperature
- Failing to calibrate the thermometer before important meals
- Not letting the meat rest before slicing and serving guests
- Applying steak temperatures to ground meat preparations incorrectly
- Opening the oven or grill lid too frequently during cooking
- Trusting cooking times instead of verifying internal temperatures
The World Health Organization notes that improper cooking temperatures contribute significantly to global foodborne disease burdens. Taking temperature seriously protects everyone at your table. Treat your thermometer as the most important tool in your kitchen.
Important: Never wash raw poultry before cooking. Washing spreads bacteria around your sink and countertops through splashing water droplets. Proper cooking to 165°F kills all relevant pathogens without creating cross-contamination risks.
People also forget that altitude affects boiling points and cooking dynamics. At higher elevations, water boils below 212°F, which changes braising and boiling times. However, internal meat temperatures for safety remain identical regardless of elevation.
Your target numbers stay the same; only the cooking method adjustments change.
How to Apply the Meat Doneness Temperature Chart for Lamb
Lamb follows similar temperature guidelines to beef, making your meat doneness temperature chart: rare to well done highly applicable. Most lamb enthusiasts prefer medium-rare to medium doneness because the fat renders nicely while the meat stays incredibly tender and flavorful.
Lamb chops, racks, and leg roasts all respond well to precise temperature control. The strong flavor profile of lamb pairs beautifully with a slightly pink center. Pushing lamb past medium tends to amplify gamey flavors that many diners find unpleasant.
Ground lamb requires the same 160°F treatment as ground beef. Bacterial contamination risks apply equally to all ground proteins regardless of species. Burgers made from lamb must reach this safe threshold before consumption.
- Rare lamb sits at 120°F to 125°F with a deep red center
- Medium-rare lamb reaches 130°F to 135°F offering ideal tenderness
- Medium lamb hits 140°F to 145°F with a warm pink interior
- Medium-well lamb climbs to 150°F to 155°F showing minimal pink
- Well-done lamb exceeds 160°F resulting in very firm texture
- Always rest lamb for appropriate times based on cut size
- Use herb crusts to complement the natural flavor profiles
The American Lamb Board suggests pulling roasts from the oven when they register five to seven degrees below your desired final temperature. This accounts for the carryover cooking discussed earlier and ensures perfect results without constant monitoring.
Marinating lamb does not change its required cooking temperatures. Acidic marinades alter surface texture and add flavor, but they do not kill internal bacteria. Always rely on heat measured by a thermometer to guarantee safety and quality.
Frequently Asked Questions
What temperature is medium-rare on a meat doneness temperature chart?
Medium-rare beef registers between 130°F and 135°F on a meat doneness temperature chart: rare to well done. At this temperature, the center remains warm and red while the exterior develops a proper sear. Always pull the steak off the heat around 125°F to 130°F to allow for carryover cooking during the resting phase.
Is it safe to eat rare chicken or turkey?
No, poultry must always reach 165°F internally to destroy harmful bacteria like Salmonella and Campylobacter. Unlike whole cuts of beef where the interior remains sterile, chicken poses serious health risks when undercooked. Never apply rare or medium-rare standards to any type of poultry product.
How do I calibrate my meat thermometer at home?
Fill a glass with crushed ice and add just enough water to fill the gaps. Insert the thermometer probe into the ice bath without touching the glass sides. It should read exactly 32°F.
If it does not, use the calibration nut or digital offset function to adjust it accordingly.
Does the meat doneness temperature change at high altitudes?
The safe internal temperatures for meat remain identical regardless of altitude. However, cooking methods involving boiling or braising take longer because water boils at lower temperatures above sea level. Your target internal numbers stay the same, but expect extended cooking times when roasting or smoking at elevation.
Can I use the same temperature chart for fish and seafood?
Fish and seafood follow different guidelines than red meat and poultry. The FDA recommends cooking fish to 145°F or until the flesh becomes opaque and flakes easily with a fork. Shrimp, lobster, and scallops also require specific visual and textural cues alongside temperature verification for best results.
Final Thoughts
Keeping a reliable meat doneness temperature chart: rare to well done in your kitchen transforms your cooking results immediately. Accurate thermometer use, proper resting, and understanding carryover cooking guarantee safe, juicy proteins every time. Master these fundamentals and elevate your meals effortlessly.