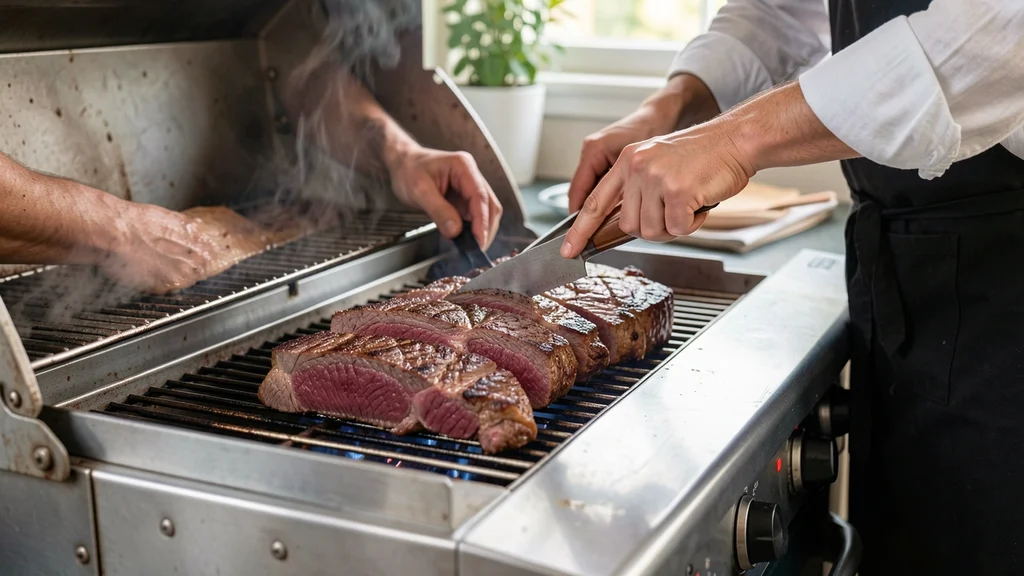
A reliable meat temperature chart for grilling, smoking, roasting and oven cooking is the single most important tool in your kitchen. Cooking meat to the right internal temperature prevents foodborne illness and guarantees tender, juicy results every time. Guessing doneness by color or texture leads to dry chicken, tough steak, or unsafe pork.
This guide covers exact target temperatures for beef, poultry, pork, lamb, and seafood across all major cooking methods. You will learn how to use a digital meat thermometer correctly, why resting times matter, and how heat transfer changes between a smoker and a hot oven. Master these numbers, and you will never ruin an expensive cut of meat again.
Simply put, a proper meat temperature chart for grilling, smoking, roasting and oven cooking gives you exact internal temperature targets for every protein. Use a calibrated instant-read thermometer, pull the meat five degrees before the target, and let it rest. This method guarantees safe, perfectly cooked food every single time.
What Is a Meat Temperature Chart for Grilling, Smoking, Roasting and Oven Cooking
A meat temperature chart for grilling, smoking, roasting and oven cooking is a reference guide that lists the safe and optimal internal temperatures for different types of proteins. The United States Department of Agriculture (USDA) sets minimum safety standards to kill harmful pathogens like Salmonella, E. coli, and Listeria.
These charts translate those scientific standards into practical numbers you can use at the grill or stove.
Different cooking methods require slightly different approaches to reaching these temperatures. A low-and-slow smoker might take twelve hours to bring a brisket to 203°F, while a roaring grill sears a steak to 135°F in under ten minutes. The target internal temperature remains the same regardless of the heat source.
What changes is the ambient temperature, the cooking time, and the carryover heat effect.
Professional chefs and pitmasters rely on these numbers daily. Home cooks should do the same. Using a chart removes the guesswork from preparing dinner.
You no longer need to cut into a steak to check if it is done, which only releases valuable juices onto the cutting board.
- Provides exact internal temperature targets for food safety
- Eliminates guesswork when cooking thick or irregular cuts
- Applies universally across gas grills, charcoal smokers, and conventional ovens
- Helps achieve specific doneness levels from rare to well-done
- Prevents overcooking expensive proteins like prime rib or filet mignon
- Ensures compliance with FDA Food Code recommendations for commercial kitchens
Important: The USDA reports that using a food thermometer is the only reliable way to ensure meat has reached a safe internal temperature. Visual cues like clear juices or brown centers are scientifically proven to be inaccurate indicators of doneness.
How to Measure Internal Meat Temperatures Accurately
Hitting the right number on your meat temperature chart for grilling, smoking, roasting and oven cooking means nothing if you measure incorrectly. Probe placement dictates your reading. Insert the thermometer tip into the thickest part of the meat.
Avoid touching bone, fat pockets, or gristle, as these materials conduct heat differently than muscle tissue and will give false readings.
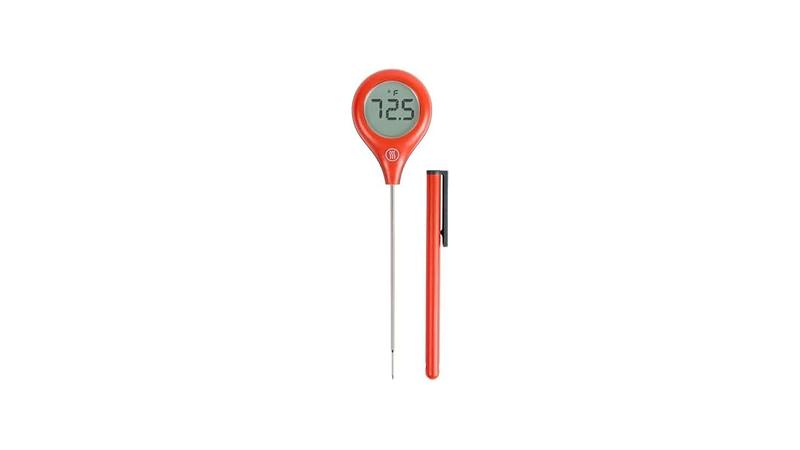
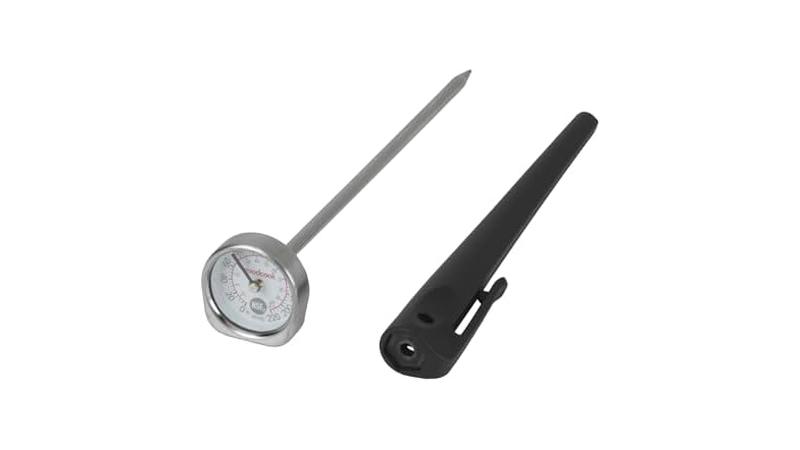
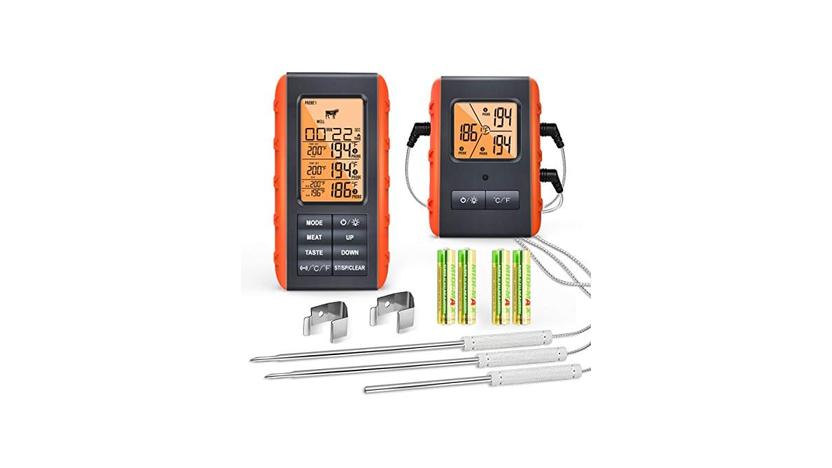
Digital instant-read thermometers like the ThermoWorks Thermapen offer readings in two to three seconds. Dial thermometers take much longer and often lack precision. For long smoking sessions, leave-in probe thermometers connected to wireless receivers allow you to monitor the internal temperature without opening the smoker lid and losing heat.
Calibration matters just as much as placement. Over time, thermometers drift out of accuracy. You should test your device regularly using the ice water method.
Fill a glass with crushed ice and cold water. Stir it, insert the probe, and wait for the reading to stabilize. It must read exactly 32°F.
If it does not, adjust the calibration nut or reset the digital offset according to the manufacturer instructions.
- Fill a tall glass completely with crushed ice and add cold tap water
- Stir the ice water mixture thoroughly for thirty seconds
- Insert the thermometer probe into the center of the glass without touching the sides
- Wait for the temperature reading to stabilize completely
- Verify the display reads exactly 32°F or 0°C
- Adjust the calibration dial or digital offset if the reading is off
| Thermometer Type | Speed | Accuracy | Best Use Case |
|---|---|---|---|
| Instant-Read Digital | 2-3 seconds | Very High | Grilling, pan-searing, quick checks |
| Dial Bimetallic | 15-20 seconds | Moderate | Oven roasting, basic home cooking |
| Leave-In Probe | Continuous | High | Smoking brisket, slow-roasting pork |
| Infrared Laser | Instant | Surface only | Checking grill grates, pizza stones |
Infrared thermometers only measure surface temperature. Never use them to check the internal doneness of a roast or a burger. They are excellent tools for verifying that your cast iron skillet or grill grate has reached the correct searing temperature before you add the protein.
Safe Beef and Lamb Temperatures for Every Doneness Level
Beef and lamb share similar temperature targets because their muscle structures react to heat in comparable ways. When consulting your meat temperature chart for grilling, smoking, roasting and oven cooking, remember that whole cuts of beef and lamb are safe at lower temperatures than ground meat. Harmful bacteria primarily live on the exterior surface of whole muscle cuts.
Searing the outside kills those pathogens effectively.
Ground beef and ground lamb present a different risk profile. The grinding process mixes surface bacteria throughout the entire batch. The National Cattlemen’s Beef Association emphasizes that all ground meat mixtures must reach 160°F internally to guarantee safety.
Eating rare burgers carries a significantly higher risk of foodborne illness compared to eating a rare steak.
Lamb chops and leg roasts follow the exact same temperature guidelines as beef steaks and roasts. Many people prefer lamb served medium-rare to medium, as cooking it past 145°F often results in a tough, gamey texture. Always pull lamb from the heat source about five degrees below your final target temperature to account for carryover cooking.
| Doneness Level | Target Temperature | Pull Temperature | Visual Description |
|---|---|---|---|
| Rare | 125°F | 120°F | Cool red center, very soft texture |
| Medium-Rare | 135°F | 130°F | Warm red center, tender and juicy |
| Medium | 145°F | 140°F | Warm pink center, slightly firm |
| Medium-Well | 150°F | 145°F | Slight pink hint, mostly gray |
| Well-Done | 160°F+ | 155°F | Completely brown, firm texture |
| Ground Beef/Lamb | 160°F | 155°F | No pink remaining anywhere |
This table serves as your primary reference for steaks, roasts, and chops. Notice the difference between the target temperature and the pull temperature. That five-degree gap represents carryover cooking, which we will discuss in detail later in this guide.
Why Poultry Requires Strict Temperature Control
Poultry demands absolute precision. Chicken, turkey, duck, and goose must reach an internal temperature of 165°F to destroy Salmonella and Campylobacter bacteria. According to the Centers for Disease Control and Prevention (CDC), roughly one million Americans get sick from poultry-related food poisoning annually.
Your meat temperature chart for grilling, smoking, roasting and oven cooking leaves zero room for error with birds.
Dark meat and white meat cook at different rates. Turkey thighs contain more connective tissue and fat than breast meat. Many pitmasters actually prefer pulling dark meat closer to 175°F because the extra heat breaks down collagen into gelatin, resulting in a silkier texture.
However, 165°F remains the absolute safety floor for all parts of the bird.
When checking a whole roasted chicken or turkey, insert the probe into the thickest part of the thigh, angling it toward the center without hitting the femur bone. Also check the thickest part of the breast. If the breast hits 165°F but the thigh only reads 150°F, the bird needs more time.
Spatchcocking the bird flattens it out, allowing both sections to reach the target temperature simultaneously.
- Whole chickens must hit 165°F in both the breast and the inner thigh
- Turkey breasts dry out rapidly past 165°F so monitor them closely
- Duck breasts are sometimes served medium-rare at 135°F but this carries inherent risks
- Ground poultry requires the exact same 165°F minimum as whole cuts
- Always check multiple spots on large birds to find the coldest zone
- Stuffing inside a bird must also reach 165°F independently of the meat
Warning: Never wash raw poultry before cooking. The CDC strongly advises against rinsing chicken in the sink, as splashing water spreads dangerous bacteria up to three feet across your countertops, utensils, and nearby foods. Cooking to 165°F is the only way to make poultry safe.
What Are the Correct Pork Temperatures for Safe Cooking
The rules for pork changed significantly in recent years. Older guidelines demanded cooking all pork to 160°F or higher, resulting in notoriously dry pork chops. The USDA revised its recommendation for whole cuts of pork down to 145°F followed by a mandatory three-minute rest period.
This change revolutionized how home cooks prepare pork loin, tenderloin, and chops.
At 145°F, pork retains a slight blush of pink in the center. This is completely safe and yields a dramatically juicier eating experience. However, this lower temperature only applies to whole muscle cuts.
Ground pork, pork sausage, and pork patties still require 160°F because the grinding process distributes bacteria throughout the meat mixture.
Tough cuts meant for barbecue operate on entirely different principles. Pork shoulder, Boston butt, and ribs contain dense networks of collagen. Cooking these cuts to 145°F leaves them unpleasantly chewy.
Barbecue requires pushing the internal temperature up to 195°F or even 205°F. At these elevated temperatures, tough collagen melts into rich gelatin, allowing the meat to pull apart effortlessly with forks.
| Pork Cut | Safe Minimum | Optimal Texture Target | Cooking Method |
|---|---|---|---|
| Pork Chops | 145°F | 145°F | Grilling, pan-searing |
| Pork Tenderloin | 145°F | 140-145°F | Roasting, grilling |
| Pork Shoulder/Butt | 145°F | 195-205°F | Smoking, braising |
| Pork Ribs | 145°F | 190-203°F | Smoking, oven baking |
| Ground Pork | 160°F | 160°F | Pan-frying, grilling |
| Fresh Ham | 145°F | 145-150°F | Oven roasting |
Notice how the safe minimum differs drastically from the optimal texture target for barbecue cuts. Safety and tenderness are two separate goals when smoking pork. You achieve safety early in the cook, but you must push through the stall to achieve tenderness.
How Does Carryover Cooking Affect Final Temperatures
Carryover cooking is the phenomenon where meat continues to rise in temperature after you remove it from the heat source. The outer layers of a roast absorb massive amounts of thermal energy during cooking. When you pull the meat off the grill, that stored heat drives inward toward the cooler center.
Ignoring this principle ruins more meals than bad seasoning ever could.
The amount of temperature rise depends heavily on the size of the cut and the intensity of the cooking heat. A massive prime rib roasted at 450°F might jump ten to fifteen degrees after leaving the oven. A thin chicken breast grilled over moderate heat might only rise three to four degrees.
Your meat temperature chart for grilling, smoking, roasting and oven cooking must account for this variable.
This is exactly why professional recipes instruct you to pull meat before it reaches the final target number. If you want a medium-rare steak at 135°F, pull it off the grill at 130°F. Tent it loosely with foil and wait five minutes.
The residual heat finishes the job gently without overshooting the mark and drying out the muscle fibers.
- Remove the protein from the grill, smoker, or oven five degrees below your target
- Transfer the meat to a warm cutting board or serving platter immediately
- Tent the meat loosely with aluminum foil to trap some ambient heat
- Allow smaller cuts like steaks and chops to rest for five to eight minutes
- Allow larger roasts and whole birds to rest for fifteen to thirty minutes
- Insert the thermometer again after resting to verify the final temperature
Tip: Resting meat does more than manage carryover cooking. It allows the contracted muscle fibers to relax and reabsorb expelled juices. Cutting into a steak immediately after grilling causes the moisture to flood the cutting board. Patience directly translates to a juicier bite.
Seafood and Fish Temperature Guidelines for Perfect Results
Fish and shellfish require a delicate touch. Overcooked seafood turns rubbery and unappetizing within seconds. The FDA recommends cooking all fish to an internal temperature of 145°F.
At this temperature, the flesh becomes opaque and flakes easily when tested with a fork. However, many culinary professionals prefer certain fish, like tuna and salmon, served at much lower temperatures for superior texture.
Sushi-grade tuna steaks are frequently seared hard on the outside and left completely raw in the center, registering barely 110°F internally. This practice relies on sourcing exceptionally high-quality, flash-frozen fish to mitigate parasite risks. For standard grocery store fish, sticking to the 145°F guideline provides the safest outcome for home cooks.
Shrimp, lobster, crab, and scallops do not work well with standard probe thermometers due to their small size and irregular shapes. Instead, rely on visual and tactile cues alongside your knowledge of heat application. Shrimp turn pink and curl into a loose “C” shape when done.
Scallops develop a golden crust and feel slightly firm but springy to the touch. Lobster shells turn bright red, and the meat pulls away from the shell cleanly.
- White fish like cod and halibut flake beautifully at exactly 145°F
- Salmon tastes best around 125°F to 130°F for a moist medium finish
- Tuna steaks are traditionally seared rare at 110°F to 115°F
- Shrimp cook incredibly fast and require only two to three minutes per side
- Scallops need blazing hot pans to form a crust before the center overcooks
- Clams and mussels are done when their shells pop fully open during steaming
According to the National Oceanic and Atmospheric Administration (NOAA), Americans consume roughly 16 pounds of seafood per person annually. With consumption this high, mastering seafood temperatures ensures you get the most value and flavor out of expensive catches. Always buy fresh seafood from reputable suppliers and keep it chilled until the moment it hits the pan.
How Do Cooking Methods Change Temperature Strategies
The environment surrounding your meat dictates how heat transfers into the center. Grilling uses direct radiant heat from below. Temperatures at the grate level often exceed 500°F.
This intense blast creates Maillard reaction browning quickly, making grilling ideal for thin steaks, burgers, and hot dogs that need fast cooking without drying out.
Smoking operates on the opposite end of the spectrum. Pitmasters maintain smoker cabinets between 225°F and 275°F for hours. This gentle convection slowly renders fat and dissolves collagen without tightening muscle proteins too aggressively.
Brisket, pork shoulder, and whole turkeys thrive in smokers. The internal temperature rises agonizingly slow, often stalling around 160°F for hours as evaporative cooling fights the ambient heat.
Oven roasting bridges the gap between grilling and smoking. You control the thermostat precisely. Starting a beef roast at 450°F for fifteen minutes builds a crust, then dropping the oven to 325°F finishes the interior gently.
Reverse searing flips this concept. You bake the steak at 250°F until it reaches 115°F internally, then drag it across a screaming hot cast iron skillet for sixty seconds per side to finish.
| Method | Typical Ambient Heat | Heat Transfer Type | Ideal Proteins |
|---|---|---|---|
| Direct Grilling | 400-600°F | Radiant and Conduction | Steaks, burgers, chops, sausages |
| Indirect Grilling | 300-400°F | Convection | Whole chickens, thick bone-in cuts |
| Low Smoking | 225-275°F | Slow Convection | Brisket, pork butt, ribs |
| Oven Roasting | 325-450°F | Ambient Convection | Prime rib, turkey, pork loin |
| Sous Vide | Exact target temp | Water Conduction | Precision steaks, chicken breasts |
Sous vide cooking eliminates carryover cooking entirely. Because the water bath sits at your exact desired final temperature, the meat cannot physically exceed that number. You simply pull the bag out and sear the exterior quickly for texture.
This method guarantees edge-to-edge perfection but requires specialized immersion circulator equipment.
Common Mistakes People Make When Checking Meat Temperatures
Even experienced home cooks fall into bad habits when monitoring doneness. The most frequent error is testing the temperature too early and too often. Every time you stab a roast with a probe, you create a channel for juices to escape.
Limit your temperature checks to the final estimated hour of cooking rather than prodding the meat every twenty minutes from the start.
Another widespread mistake involves relying on built-in oven dials or cheap analog thermometers. Consumer Reports tests consistently reveal that many oven thermostats run twenty-five to fifty degrees hotter or cooler than their displayed setting. Always use a standalone oven thermometer placed on the rack next to your food to verify the actual cooking environment matches your expectations.
People also forget that different parts of the same piece of meat cook unevenly. A whole turkey features thick thighs and thin wings attached to the same carcass. Checking only the breast might tell you the bird is done while the thigh joint remains dangerously undercooked.
Always probe multiple locations, focusing specifically on the thickest, densest areas furthest from the surface.
Warning: Never leave a standard instant-read thermometer inside an oven or closed grill. The plastic heads and battery compartments melt under sustained high heat. Only use designated leave-in probes rated for continuous oven exposure. Destroyed thermometers contaminate your food with battery acid and melted plastic.
Failing to clean the probe between uses introduces cross-contamination risks. If you check a raw chicken breast and then immediately stick the same unwashed probe into a finished steak, you transfer dangerous bacteria directly into the safe food. Wipe your thermometer shaft with an alcohol prep pad or hot soapy water between every single test.
Frequently Asked Questions
What is the most accurate type of thermometer for grilling?
Digital instant-read thermometers with thermocouple sensors provide the fastest and most accurate readings for grilling. They register temperatures in two to three seconds, minimizing the time the grill lid stays open. Brands favored by competition pitmasters typically feature splash resistance and easy calibration functions for long-term reliability.
Can I eat pork that is slightly pink in the middle?
Yes, whole cuts of pork cooked to 145°F often retain a slight pink hue in the center. The USDA confirmed this is perfectly safe provided the meat rests for three full minutes before carving. Ground pork products, however, must reach 160°F and show absolutely no pink coloring anywhere.
Why does my smoked brisket stop rising in temperature?
This phenomenon is known as the stall, usually occurring between 150°F and 170°F. Moisture evaporating from the surface of the brisket cools the meat at the exact same rate the smoker heats it. Wrapping the brisket tightly in butcher paper or aluminum foil traps the moisture and pushes the internal temperature through the plateau.
Do I need to adjust temperatures for high altitude cooking?
Water boils at lower temperatures at high altitudes, which affects braising and boiling methods significantly. However, the safe internal temperature targets for meat remain exactly the same regardless of elevation. You may need to increase cooking times or adjust oven heat slightly to achieve those internal targets efficiently above 3,000 feet.
How long can cooked meat sit out before it becomes unsafe?
The USDA mandates discarding perishable foods left in the danger zone between 40°F and 140°F for more than two hours. If outdoor temperatures exceed 90°F, that window shrinks to just one hour. Always refrigerate leftovers promptly in shallow containers to encourage rapid, even cooling throughout the meat.
Final Thoughts
Keeping a reliable meat temperature chart for grilling, smoking, roasting and oven cooking handy transforms your results instantly. Invest in a quality digital thermometer, respect the pull temperatures for carryover cooking, and always prioritize food safety guidelines. Master these fundamentals, and every meal you fire up will deliver restaurant-quality perfection.