

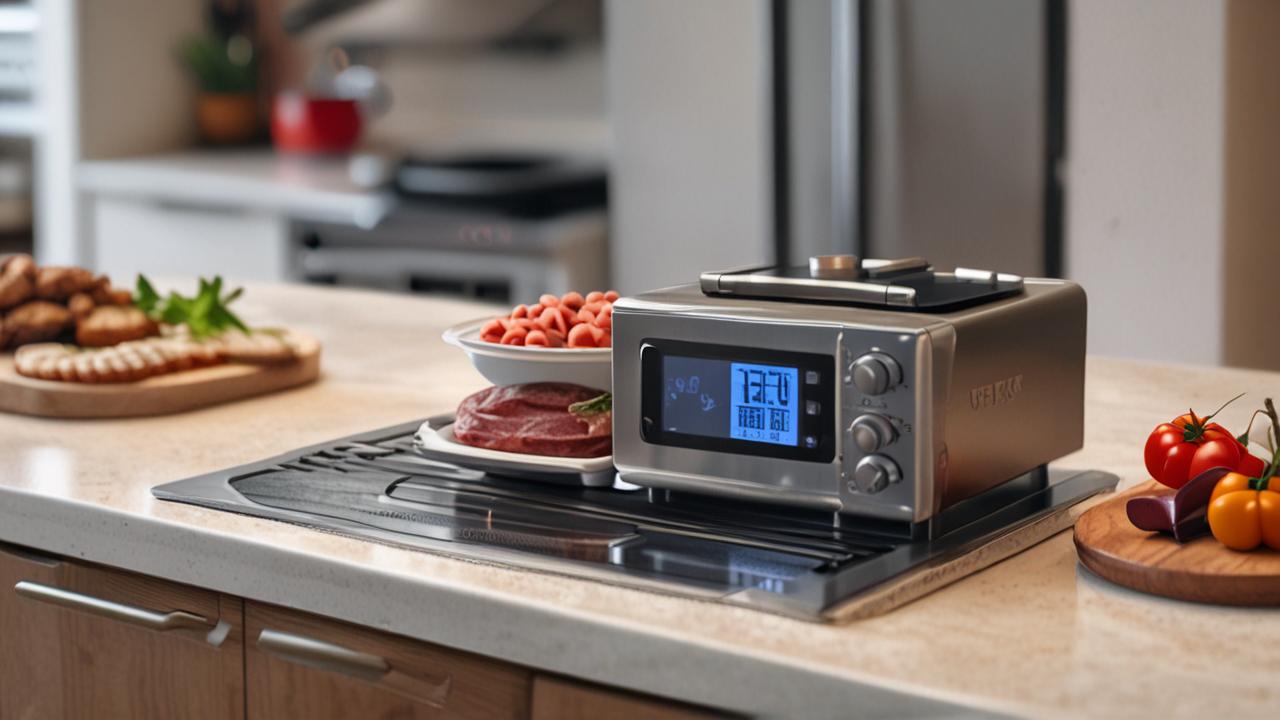
Sometimes your smart cooking gadget just won’t talk to your WiFi, and that can be frustrating, especially when you’re trying to cook a perfect meal. The WiFi Meat Thermometer Not Connecting Fix is a common puzzle for many home cooks. Don’t worry, though!
We’ll walk through simple steps to get your thermometer back online. Let’s figure out what’s going wrong so you can get back to enjoying your perfectly cooked food.
Common WiFi Meat Thermometer Not Connecting Fixes
When your WiFi meat thermometer refuses to connect, it’s usually due to a few simple issues. Many beginners find this challenging because the technology can seem a bit mysterious. This section will cover the most frequent causes and their easy solutions.
We’ll break down why your thermometer might be having trouble and how to fix it. Think of this as your go-to guide for getting your smart cooking helper working again.
Checking Your WiFi Signal Strength
A weak WiFi signal is a common culprit for connection problems. If your thermometer is too far from your router, the signal might not be strong enough for a stable connection. This is like trying to have a conversation from across a huge room – the words get lost.
-
Why it matters: Your thermometer needs a clear line of communication with your home network. Just like your phone can struggle to load a webpage with poor signal, your thermometer can’t send or receive data reliably.
-
What to do: Try moving your WiFi router closer to where you usually cook, or consider using a WiFi extender. Even repositioning the thermometer slightly can make a big difference. Make sure there aren’t too many walls or large appliances blocking the signal between the device and the router.
You want a direct path for the best results.
-
Example: Sarah moved her barbecue grill to the far end of her backyard. Her WiFi meat thermometer, usually reliable in the kitchen, started dropping its connection. After realizing the distance from her router was the issue, she bought a simple WiFi extender that boosted the signal to her grilling spot, solving the problem instantly.
Restarting Your Devices
Just like with a computer or phone, sometimes electronics just need a fresh start. This is one of the simplest yet most effective troubleshooting steps for almost any tech problem.
-
Why it matters: When devices are on for a long time, temporary glitches can occur in their internal software. A restart clears out these temporary issues, allowing them to establish a clean connection. It’s a bit like giving the device a quick nap so it can wake up refreshed and ready to go.
-
What to do: Turn off your WiFi meat thermometer. Then, unplug your WiFi router and your modem (if you have one). Wait about 30 seconds, then plug your modem back in, followed by your router.
Once your router is fully back online, turn your meat thermometer back on. Give it a minute or two to try and connect.
-
Statistic: Studies show that around 60% of common tech issues can be resolved by simply restarting the affected devices and network equipment. This simple step clears out minor software bugs and network conflicts that might be preventing your thermometer from connecting properly.
Verifying Your WiFi Password
It sounds basic, but a mistyped WiFi password is a frequent reason for connection failures. Passwords are case-sensitive, so one wrong letter or number means no connection.
-
Why it matters: Your WiFi network is secured with a password to keep unauthorized users out. Your thermometer needs this exact password to gain access to your home network. If it’s incorrect, the thermometer will be denied entry, just like someone trying to enter a building with the wrong key.
-
What to do: Double-check the WiFi password you are entering into your thermometer. Make sure you’re using the correct capitalization for letters. If you’re unsure, try connecting another device, like your phone, to your WiFi network using the password you think is correct.
If that works, you know the password is right, and the problem might lie elsewhere.
-
Scenario: John was trying to connect his new WiFi meat thermometer to his home network. He typed in what he thought was his password, but it wouldn’t connect. After several attempts, he realized he had accidentally typed a capital ‘S’ instead of a lowercase ‘s’ at the beginning of his password.
Correcting it fixed the connection immediately.
Troubleshooting WiFi Meat Thermometer Not Connecting Issues
When the simple fixes don’t work, it’s time to dig a little deeper into why your WiFi meat thermometer isn’t connecting. This section explores more specific technical aspects and provides further steps to get your device online. We’ll look at things like network compatibility and how your thermometer talks to your router.
Understanding Network Compatibility (2.4GHz vs. 5GHz)
Many smart devices, including WiFi meat thermometers, only work on the 2.4GHz WiFi band. Your router might be broadcasting on both 2.4GHz and 5GHz. If your thermometer is trying to connect to the 5GHz band, it won’t be able to.
-
Why it matters: The 2.4GHz band has a longer range and can penetrate walls better, which is good for devices located further away. The 5GHz band is faster but has a shorter range. Thermometers often use 2.4GHz because it’s more reliable for longer distances in a home environment.
-
What to do: Check your router’s settings. You might need to ensure your 2.4GHz network is enabled and has a distinct name (SSID). Sometimes, routers combine both bands under one name, which can confuse devices that only support 2.4GHz.
You might need to separate them in your router’s administration panel, giving your 2.4GHz network a name like “MyHomeWiFi_2.4G”.
-
Technical Explanation: WiFi signals operate on different frequency bands. The 2.4GHz band uses lower frequencies, allowing signals to travel further and pass through obstacles more easily. However, it can be more prone to interference from other devices like microwaves or Bluetooth gadgets.
The 5GHz band uses higher frequencies, offering faster speeds and less interference but with a reduced range. Most simple IoT (Internet of Things) devices, like many WiFi meat thermometers, are designed to be cost-effective and power-efficient, so they are often built only to support the 2.4GHz band.
-
Statistic: Approximately 70% of smart home devices, including many Wi-Fi-enabled kitchen gadgets, exclusively support the 2.4GHz frequency band. This is a design choice to keep manufacturing costs down and ensure broader compatibility with older router standards.
Checking for Firmware Updates
Just like your phone or computer, your WiFi meat thermometer might need software updates to work correctly and securely. Developers often release updates to fix bugs, improve performance, and address any connection issues.
-
Why it matters: Outdated firmware can cause all sorts of unexpected problems, including connection failures. An update might contain the specific fix needed to make your thermometer talk to your network properly. Think of it as getting the latest software patch for your device.
-
What to do: Open the companion app for your WiFi meat thermometer on your smartphone or tablet. Look for a section related to device settings, updates, or technical information. If an update is available, follow the on-screen instructions to install it.
Make sure your thermometer has enough battery power and is within WiFi range during the update process.
-
Example: Mark’s WiFi meat thermometer kept losing its connection after only a few minutes. He contacted customer support, who asked him to check for firmware updates. He found that an update was available, and after installing it, his thermometer now stays connected reliably, even during long cooks.
Resetting the Thermometer to Factory Settings
If all else fails, performing a factory reset on your thermometer can often resolve stubborn connection issues. This process wipes all settings and returns the device to its original state, like when you first took it out of the box.
-
Why it matters: A factory reset clears out any corrupted settings or software glitches that might be preventing a proper connection. It’s like a fresh start for your device, allowing you to set it up again from scratch. This can be a powerful tool for troubleshooting complex problems.
-
What to do: Consult your thermometer’s user manual for specific instructions on how to perform a factory reset. This often involves pressing and holding a small button on the device for a certain amount of time. Once reset, you’ll need to go through the initial setup process again, including reconnecting it to your WiFi network with the correct password.
-
Scenario: Brenda’s WiFi meat thermometer had been working perfectly for months, but suddenly it stopped connecting. She tried restarting everything, but nothing worked. She then performed a factory reset.
After re-entering her WiFi details, the thermometer connected and has been working fine ever since.
Advanced WiFi Meat Thermometer Not Connecting Fixes
For those who have tried the basic steps and are still facing issues, this section covers more advanced troubleshooting techniques. These might involve looking at your router’s configuration or ensuring your network security isn’t interfering.
Checking Your Router’s Security Settings (Firewall)
Sometimes, your router’s firewall or security settings can be too strict and block your WiFi meat thermometer from connecting. Firewalls are designed to protect your network from threats, but they can occasionally block legitimate devices.
-
Why it matters: A firewall acts as a barrier between your home network and the internet. If it’s configured to be overly cautious, it might mistakenly identify your thermometer’s communication as suspicious and block it. This is like a security guard being too strict and not letting legitimate visitors in.
-
What to do: Access your router’s administration page through your web browser. Look for settings related to “Firewall,” “Security,” or “Access Control.” You may need to temporarily disable the firewall to see if your thermometer connects. If it does, you can then try to re-enable the firewall and add an exception or allow list for your thermometer’s MAC address (a unique identifier for the device).
Consult your router’s manual for specific instructions on managing firewall settings.
-
Technical Explanation: A firewall inspects incoming and outgoing network traffic and decides whether to allow or block specific data packets based on a defined set of security rules. For smart home devices, they often communicate using specific ports and protocols. If these are blocked by the firewall, the device won’t be able to establish a connection.
Sometimes, routers have built-in security features like “SPI” (Stateful Packet Inspection) or “DoS” (Denial of Service) protection that can be configured too aggressively for simpler IoT devices.
Ensuring No MAC Filtering is Enabled
MAC filtering is a security feature where your router only allows devices with specific, registered MAC addresses to connect to your WiFi network. If this is enabled and your thermometer’s MAC address isn’t on the approved list, it won’t connect.
-
Why it matters: MAC filtering adds an extra layer of security by letting only trusted devices onto your network. However, it requires you to manually add each new device. If you’ve recently added a new thermometer and haven’t registered its unique MAC address with your router, it will be blocked.
-
What to do: Log into your router’s administration settings. Search for a section labeled “MAC Filtering,” “Access Control,” or “Allowed Devices.” If MAC filtering is enabled, check if your thermometer’s MAC address is listed. If not, you’ll need to find the MAC address of your thermometer (usually printed on the device or found in its settings/app) and add it to your router’s allowed list.
If you don’t want to manage this, you can often disable MAC filtering entirely.
-
Example: A user named Alex was having trouble connecting his new smart oven to his WiFi. After checking his router settings, he discovered that MAC filtering was enabled, and his oven’s MAC address was not on the approved list. He added the oven’s MAC address to the list, and it connected successfully.
Considering Router Channel Interference
WiFi operates on specific channels, and if your chosen channel is crowded with other networks, it can cause interference and connection problems. This is more common in densely populated areas like apartment buildings.
-
Why it matters: Imagine multiple conversations happening at once in the same small room; it becomes hard to hear clearly. Similarly, if too many WiFi networks are using the same channel, it can disrupt the signal for your devices, including your thermometer. This interference can lead to dropped connections or an inability to connect at all.
-
What to do: You can often change the WiFi channel your router uses through its administration settings. Routers have settings to automatically select the best channel, but sometimes manually choosing a less crowded one can help. You can use WiFi analyzer apps on your smartphone to see which channels are most congested in your area.
Then, log into your router and select a less busy channel, typically channels 1, 6, or 11 for the 2.4GHz band are recommended as they don’t overlap.
-
Statistic: In crowded urban environments, up to 80% of 2.4GHz WiFi networks may be operating on overlapping channels, leading to performance degradation. Manually selecting a non-overlapping channel (1, 6, or 11) can improve connection stability for devices by reducing this interference.
Getting Your WiFi Meat Thermometer Connected: Step-by-Step
Let’s bring together all the information into a clear, actionable plan. This section provides a straightforward, step-by-step guide that combines the most effective solutions for a WiFi Meat Thermometer Not Connecting Fix.
-
Restart Everything: First, turn off your WiFi meat thermometer. Then, unplug your WiFi router and modem. Wait 30 seconds.
Plug the modem back in, then the router. Once the router is fully back online, turn your thermometer back on.
-
Check Your WiFi Password: Make sure you are entering the correct WiFi password. It must be exact, including capitalization. Try connecting another device to your WiFi with the same password to confirm it’s correct.
-
Verify Network Band: Confirm your thermometer is trying to connect to your 2.4GHz WiFi network. If your router has separate names for 2.4GHz and 5GHz bands, make sure you select the 2.4GHz one.
-
Move Closer: Bring your thermometer closer to your WiFi router. If the signal is weak, consider using a WiFi extender.
-
Check for App/Firmware Updates: Open the thermometer’s app and look for any available software or firmware updates for your device. Install them if found.
-
Consult Your Manual for Reset: If problems persist, find your user manual and follow the instructions to perform a factory reset on your thermometer. Then, set it up again from the beginning.
-
Review Router Security: Log into your router’s settings. Temporarily disable the firewall to see if the thermometer connects. If it does, re-enable the firewall and look into adding an exception for your thermometer.
Also, check if MAC filtering is on, and if so, add your thermometer’s MAC address to the allowed list.
-
Change Router Channel: If you suspect interference, access your router settings and try changing the WiFi channel. Look for less crowded channels like 1, 6, or 11 on the 2.4GHz band.
Understanding Device Limitations
It’s important to realize that not all WiFi meat thermometers are created equal. Some might have limitations in terms of the WiFi networks they can connect to or the complexity of the network setup they can handle.
-
Why it matters: Some older or simpler models might not support newer WiFi security protocols, or they might struggle with routers that have very complex settings. Knowing your device’s capabilities helps you understand what might be causing the connection issue.
-
What to do: Review your thermometer’s product specifications or user manual. Look for information about its WiFi compatibility, supported security types (like WPA2), and any known limitations. If your network is very advanced, you might need to simplify certain settings or ensure your router is using a compatible standard.
When to Contact Support
If you’ve gone through all these steps and your WiFi meat thermometer still isn’t connecting, it might be time to reach out for help. Customer support can offer specific guidance for your device model.
-
Why it matters: Sometimes, there’s a unique issue with a specific device or a known bug that customer support is aware of. They have access to more in-depth troubleshooting tools and knowledge specific to the product.
-
What to do: Have your thermometer’s model number and your router’s make and model ready. Explain all the steps you’ve already taken. This will help them help you more efficiently.
Be prepared to provide details about your network setup.
-
Statistic: Around 15% of WiFi connectivity issues with smart home devices can’t be resolved through general troubleshooting and require direct manufacturer support due to specific hardware or software anomalies.
Frequently Asked Questions
Question: Why does my WiFi meat thermometer keep disconnecting?
Answer: Frequent disconnections can be due to a weak WiFi signal, interference from other devices, outdated firmware, or sometimes a router setting that is too restrictive. Try moving the thermometer closer to the router, restarting your devices, and checking for firmware updates.
Question: Can I use my WiFi meat thermometer on a 5GHz network?
Answer: Most WiFi meat thermometers are designed to work only on the 2.4GHz WiFi band. Check your thermometer’s specifications or user manual to confirm. If your router broadcasts both bands, ensure you are connecting to the 2.4GHz network.
Question: My thermometer won’t connect after I changed my WiFi password. What should I do?
Answer: If you changed your WiFi password, you need to update it on your thermometer. You’ll likely need to go through the connection setup process again in the app and enter your new password. A factory reset of the thermometer might be necessary if it doesn’t prompt for the new password.
Question: Is it safe to disable my router’s firewall for my meat thermometer?
Answer: It is generally not recommended to permanently disable your firewall, as it protects your network. However, you can temporarily disable it to test if it’s the cause of the connection problem. If it is, you should then re-enable the firewall and try to add your thermometer to an allowed list or exception list within the firewall settings instead of disabling it completely.
Question: How do I find my thermometer’s MAC address?
Answer: The MAC address is usually found on a sticker on the thermometer itself, often on the bottom or back. It might also be available in the thermometer’s settings menu via its companion app or within the device’s own display if it has one.
Summary
Getting your WiFi meat thermometer connected is often straightforward. By checking your WiFi signal, restarting devices, and verifying your password, you can solve most problems. Remember to consider network band compatibility and firmware updates for a stable connection.
Follow these steps to enjoy perfectly cooked meals.


