
Sometimes, your trusty meat thermometer might act a little funny. You might get odd readings, or it just won’t turn on like it used to. This can be a bit confusing, especially if you’re new to cooking with one and are just figuring out How to Reset a Meat Thermometer Step by Step.
Don’t worry, it’s usually not a big deal! We’ll walk you through it simply. First, let’s see why your thermometer might need a little refresh and what tools you’ll need.
Understanding Your Meat Thermometer
Meat thermometers are super handy tools for anyone who cooks. They help make sure your food is cooked to the perfect temperature, making it safe and delicious. Without one, you might be guessing if that chicken breast is done, which can lead to undercooked or overcooked meals.
Knowing how your thermometer works, and how to keep it in good shape, means you’ll always have perfectly cooked food. This section will give you a clear picture of the different types of thermometers and what makes them tick, so you know what you’re working with when it comes time to reset it.
Types of Meat Thermometers
There are a few main kinds of meat thermometers you’ll see. Each works a bit differently, but they all have the same goal: to tell you the temperature of your food accurately. Knowing which type you have helps when you need to do any kind of fix, including a reset.
It’s like knowing if you have a car or a bicycle; they both get you places, but you fix them differently.
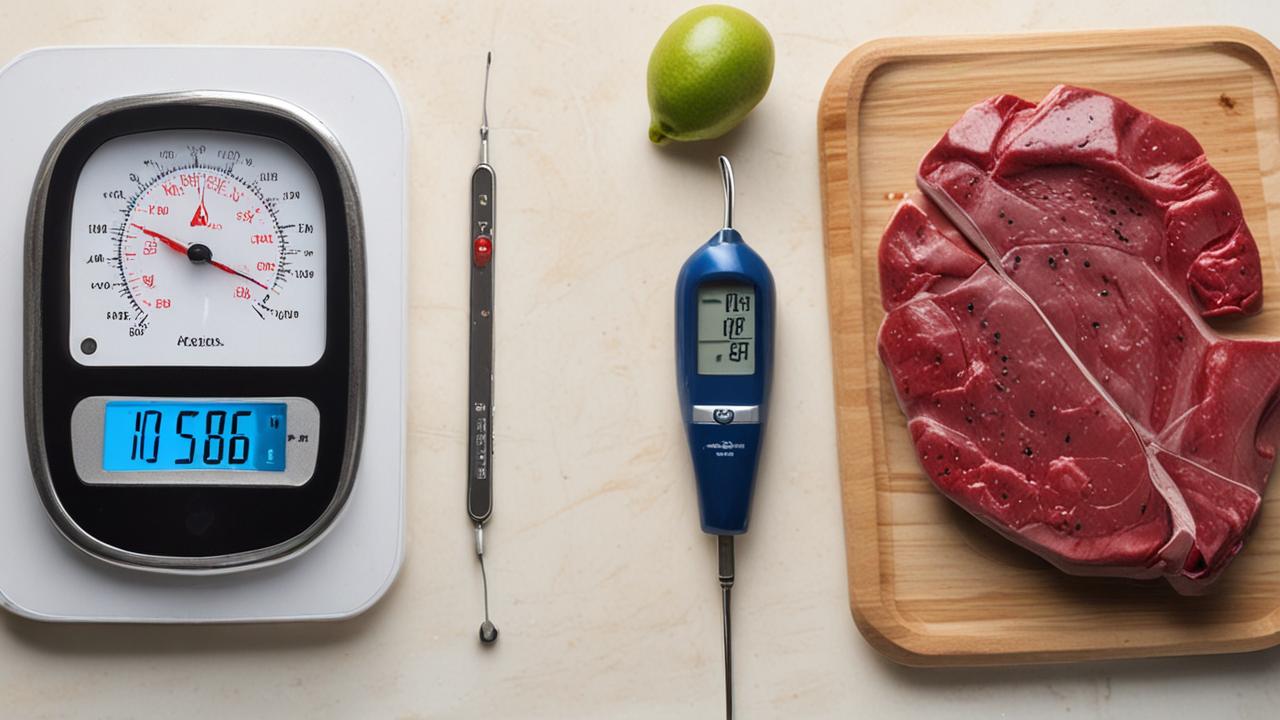
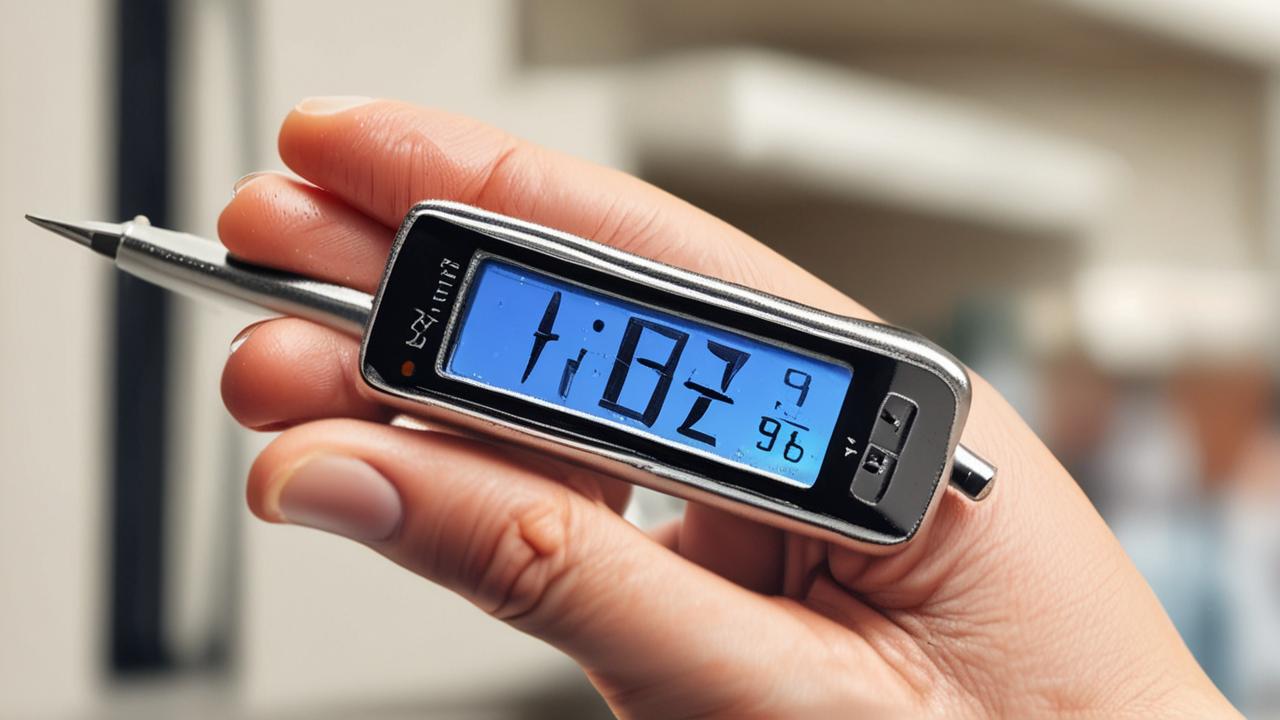
- Instant-Read Thermometers: These are very common and have a metal probe you stick into the food. They give you a reading very quickly, usually in a few seconds. They are great for quick checks on steaks, chicken, and roasts. The probe often has a digital display right on top, or it might connect to a base unit with a wire.
- Probe Thermometers (with wires): These are popular for roasting or grilling. They have a probe that stays in the meat, connected by a heat-resistant wire to a display unit that sits outside the oven or grill. This lets you monitor the temperature without opening the cooking device, which keeps the heat in and cooking consistent.
- Smart Thermometers: These are the most modern. They connect to your phone via Bluetooth or Wi-Fi. You can watch the temperature change on an app, often getting alerts when your food is ready. They usually come with one or more probes.
The basic idea behind most of these is a thermistor or thermocouple. A thermistor is a type of resistor whose resistance changes significantly with temperature. A thermocouple uses two different metals that create a small voltage when heated or cooled.
The thermometer’s electronics read this change and convert it into a temperature number you can see.
Why Might a Thermometer Need Resetting?
Like any electronic gadget, meat thermometers can sometimes get a bit mixed up. This happens for a few reasons. Maybe you dropped it, or it got too hot or too cold for too long.
Sometimes, even just a dead battery can make it act weird. A reset can often fix these little glitches and get your thermometer working right again.
Think of it like restarting your computer when it freezes up. A reset clears out any temporary errors or confused signals inside the thermometer’s brain. It’s a simple way to try and fix things before you think about buying a new one.
It’s a common fix for many digital devices.
Other reasons a reset might be needed include:
- The thermometer shows an incorrect or fluctuating temperature. This is a clear sign something is off.
- The display is frozen or not responding to button presses. The screen might be stuck on one number or simply won’t show anything when you try to use it.
- The device won’t turn on even with fresh batteries. Sometimes, even good batteries can’t overcome a software hiccup.
- After changing batteries, the thermometer doesn’t seem to be working correctly. Sometimes, the electronics need a little nudge to start fresh with the new power source.
The Step-by-Step Guide: How to Reset a Meat Thermometer Step by Step
Now we get to the good part: actually fixing your thermometer! This section will walk you through the common ways to reset your device. Most of the time, it’s a very simple process.
We’ll cover the most common methods so you can get back to cooking perfect meals without worry. You’ll see just how easy it can be to bring your thermometer back to life.
Method 1: The Battery Pull (Most Common for Digital Thermometers)
This is the go-to method for many digital meat thermometers. It’s simple, requires no special tools, and works for a wide range of models. It’s essentially like giving the thermometer a quick power cycle.
Here’s how it’s done:
- Locate the Battery Compartment: Most digital meat thermometers have a small door or cover on the back or side. You might need a small screwdriver to open it, or it might simply flip open.
- Remove the Batteries: Once you have the compartment open, carefully take out all the batteries. Make sure you see them all.
- Wait a Few Minutes: This is the crucial part. Leave the batteries out for about 3 to 5 minutes. This allows any residual power in the thermometer’s circuits to drain away, effectively clearing its memory.
- Reinsert the Batteries: Put the batteries back into the compartment, making sure they are facing the correct direction (positive (+) and negative (-) ends).
- Close the Compartment: Securely close the battery cover.
- Turn On and Test: Turn your thermometer on and see if it’s working correctly. You might need to set the temperature unit (Celsius or Fahrenheit) again.
This method works because it completely cuts power to the thermometer’s internal electronics. When the power is restored, the device starts up fresh, like it did the first time you used it. This can clear out any temporary software glitches or errors that were causing it to misbehave.
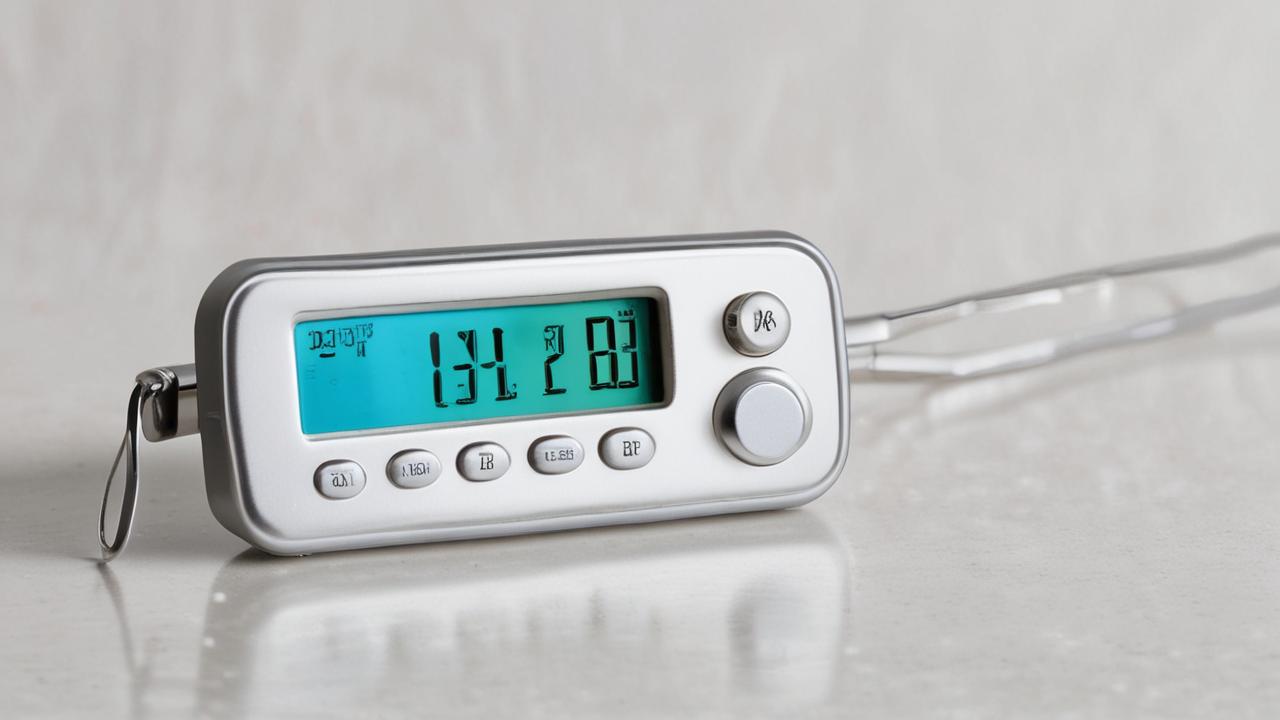
Method 2: The Reset Button (For Thermometers with This Feature)
Some higher-end or specialized meat thermometers come with a dedicated reset button. This is designed to perform a more thorough reset than just pulling the batteries. If your thermometer has one, it’s usually the best first step.
Finding this button can sometimes be tricky. It’s often a very small button, sometimes recessed into a tiny hole, so you’ll need a pointed object like a paperclip or a pen tip to press it.
Steps for using a reset button:
- Consult Your Manual: If you have the user manual for your thermometer, check it to see if it has a reset button and where it’s located. This is the most reliable way to find it.
- Locate the Button: Look carefully on the device itself. It might be on the back, side, or even near the display. Sometimes it’s labeled “Reset” or has a symbol like a circle with an arrow.
- Press and Hold: Use a pointed object to press and hold the reset button. You might need to hold it for 5 to 10 seconds. The exact time can vary by model, so checking the manual is helpful.
- Release the Button: Let go of the button.
- Check the Display: The thermometer should either turn off and then back on, or its display will change, indicating the reset has occurred.
- Test the Thermometer: Turn it on and check its readings to ensure it’s functioning properly. You may need to re-enter settings like temperature units.
A reset button often triggers a deeper system reset, which can be more effective at clearing complex software issues than simply removing the batteries. It’s a more direct way to tell the thermometer’s internal system to start over from its factory settings.
Method 3: Re-Pairing Smart Thermometers
If you have a smart meat thermometer that connects to your phone or tablet, sometimes the issue isn’t with the thermometer itself but with the connection. A reset for these devices often involves re-establishing this link.
This process can differ greatly depending on the brand and model of your smart thermometer. However, the general idea is to “forget” the device in your phone’s Bluetooth settings and then pair it again.
Here’s a general approach:
- Turn Off the Thermometer: Make sure your smart thermometer is turned off.
- Open Your Phone’s Settings: Go to the Bluetooth settings on your smartphone or tablet.
- “Forget” the Device: Find your meat thermometer in the list of paired devices. There should be an option to “Forget Device,” “Unpair,” or remove it. Select this option.
- Restart Your Phone (Optional but Recommended): Sometimes restarting your phone helps clear out temporary connection issues.
- Reset the Thermometer (if applicable): Some smart thermometers might have a battery pull or reset button method in addition to re-pairing. Follow those steps if necessary.
- Put Thermometer in Pairing Mode: Turn your thermometer back on and follow its instructions to put it into pairing mode. This is usually done by holding down a specific button.
- Pair Again: On your phone, search for new Bluetooth devices. Your thermometer should appear in the list. Select it to pair.
- Confirm Connection: Open the companion app for your thermometer. It should now connect to the device, and you can test its functionality.
This method is vital because smart devices rely on seamless communication between the thermometer and your phone. If this communication breaks down, the thermometer might seem unresponsive or show incorrect data, even if its internal components are fine. Re-pairing ensures a fresh start for that connection.
Method 4: Cleaning and Battery Check
Sometimes, the problem isn’t a complex technical glitch but something very simple. A dirty probe or corroded battery contacts can cause all sorts of issues. Before attempting a reset, it’s always wise to do a quick check and clean.
For the probe:
- Wipe it Clean: Use a damp cloth or paper towel to gently wipe the metal probe. For stubborn residue, a little mild soap and water can help, but make sure to rinse and dry it thoroughly.
- Avoid Harsh Cleaners: Never use abrasive cleaners or steel wool, as they can scratch the probe or damage its coating.
- Dry Completely: Ensure the probe is completely dry before using the thermometer. Moisture can sometimes interfere with readings or cause electronic issues.
For the battery contacts:
- Visual Inspection: Look inside the battery compartment. Do you see any white or greenish powdery substance? This is corrosion.
- Clean with an Eraser: Gently rub the battery contacts with a pencil eraser. This can often remove light corrosion.
- Use a Cotton Swab and Vinegar: For more stubborn corrosion, dip a cotton swab in white vinegar or lemon juice. Gently scrub the contacts. Then, wipe them clean with a damp cloth and dry them thoroughly.
- Ensure Good Contact: Make sure the batteries are sitting snugly and making good contact with the terminals. Sometimes, slightly bending the metal contacts can improve the connection.
These simple steps can often resolve issues without needing a formal reset. Cleanliness and good battery connection are fundamental for reliable electronic performance. It’s a good habit to maintain the probe’s cleanliness for accurate readings and to check battery contacts periodically.
When a Reset Doesn’t Work
If you’ve tried the various reset methods and your meat thermometer is still not behaving, it might be time to consider other possibilities. Sometimes, a thermometer is simply at the end of its useful life, or there might be a more serious internal problem that can’t be fixed with a simple reset. This section looks at what else could be wrong and what your options are.
Understanding Thermometer Lifespans
All electronic devices, including meat thermometers, have a lifespan. The quality of the components, how often it’s used, and how it’s cared for all play a role. A thermometer that’s used daily for professional cooking will likely not last as long as one used for occasional home grilling.
Batteries degrade over time, internal components can wear out, and even water damage from improper cleaning can affect longevity.
For example, a study by a consumer electronics research group found that the average lifespan for a digital kitchen thermometer is between 3 to 5 years with regular use. However, this can be extended with proper care and maintenance. Cheaper models might not last as long, while high-end, durable models could potentially last much longer.
It’s also worth considering the technology within the thermometer. As technology advances, older models may become less accurate or reliable compared to newer ones. For instance, modern smart thermometers offer features and accuracy levels that were not possible even a decade ago.
Here are some signs your thermometer might be nearing the end of its life:
- Inconsistent Readings: If the temperature jumps around or gives different readings within seconds of each other, it’s a sign the sensor or internal electronics are failing.
- Slow Response Time: If it takes a very long time to get a reading, longer than it used to, the internal components might be degrading.
- Display Issues: Beyond simple glitches that a reset fixes, if the display is dim, has dead pixels, or is permanently showing error codes, it’s likely beyond repair.
- Physical Damage: Cracks in the casing, a loose probe, or a frayed wire (for probe thermometers) often mean the thermometer is no longer safe or reliable to use.
According to a survey of culinary professionals, nearly 60% replace their most-used kitchen thermometers every two to three years to ensure consistent results. This highlights that even for experts, these tools have a functional lifespan.
When to Consider Replacement
If you’ve tried all the reset methods and cleaning, and the thermometer still isn’t working right, it’s probably time for a new one. Sometimes, trying to fix something that’s broken beyond simple resets can be more trouble than it’s worth, and you might not get reliable results anyway. Food safety is too important to risk using faulty equipment.
Think about how much you rely on your thermometer. If cooking is a hobby, a less expensive model might suffice. If you cook often or for many people, investing in a good quality, durable thermometer can be a worthwhile expense.
Newer models also offer features like faster read times, better accuracy, and connectivity, which can improve your cooking experience.
Here are a few things to think about when deciding to replace your thermometer:
- Cost of Repair vs. Replacement: If a thermometer is very inexpensive, it’s usually not worth the effort or cost to try and repair it if a reset doesn’t work. You can often buy a new one for less than the cost of trying to get the old one professionally fixed, if that’s even an option.
- Accuracy Concerns: If you have doubts about the accuracy of your current thermometer, even after troubleshooting, it’s safer to replace it. Inaccurate readings can lead to undercooked food, which is a health risk.
- Technological Advancements: Newer thermometers might offer features that can make your cooking easier or more enjoyable. For example, a smart thermometer can send alerts to your phone, letting you know when your roast is perfectly cooked without you having to constantly check it.
A recent report on kitchen appliance trends noted a significant increase in sales of smart thermometers, with over 35% of consumers purchasing one in the last year, indicating a desire for advanced features and convenience.
Maintaining Your Meat Thermometer
Keeping your meat thermometer in good shape is key to making sure it lasts a long time and always gives you accurate readings. Proper care is simple and can prevent many problems that might make you think you need a reset. This section will give you tips on how to look after your thermometer so it stays reliable.
Proper Cleaning Techniques
Cleaning your meat thermometer correctly after each use is one of the most important things you can do. This not only keeps it hygienic but also helps prevent food particles or grease from interfering with its function or sensors.
Always follow these guidelines:
- Clean the Probe After Every Use: As mentioned before, wipe the probe with a damp, soapy cloth. If there’s baked-on food, a gentle scrub with a non-abrasive sponge might be needed. Rinse it well and dry it completely.
- Never Submerge Digital Thermometers: Most digital thermometers are not waterproof. Water can seep into the electronics and cause damage. Clean the body of the thermometer with a damp cloth only.
- Avoid the Dishwasher: The high heat and harsh detergents in a dishwasher can damage the thermometer, especially the seals and the electronic components. Handwashing is always best for these devices.
- Dry Thoroughly: Ensure all parts of the thermometer, especially the probe and any connection points, are completely dry before storing it.
Following these cleaning steps helps maintain the integrity of the thermometer’s components and ensures that its readings remain accurate over time. Keeping it clean also prevents flavor transfer between different foods.
Storage and Handling Tips
How you store and handle your thermometer can also impact its performance and lifespan. Treating it with care will help it last much longer.
Consider these storage tips:
- Use a Protective Case: Many thermometers come with a case or sheath for the probe. Always use this when not in use to protect the probe from damage and accidental contact.
- Store in a Dry Place: Keep your thermometer in a dry environment, away from extreme temperatures or humidity. A kitchen drawer or a utensil organizer is usually a good spot.
- Avoid Extreme Temperatures: Don’t leave your thermometer in a hot car, near a hot stove, or in a freezing garage for extended periods. Extreme temperatures can damage the batteries and the internal electronics.
- Handle Gently: Treat your thermometer like the delicate instrument it is. Avoid dropping it or bending the probe excessively.
Proper storage and handling ensure that the thermometer remains in optimal condition. This reduces the chances of accidental damage and contributes to its overall longevity, meaning fewer resets and replacements.
Battery Care and Replacement
Batteries are the lifeblood of digital thermometers. Taking care of them ensures consistent power and prevents issues that might mimic the need for a reset.
Here’s what to do:
- Use Quality Batteries: Always use good quality batteries from reputable brands. Cheap batteries can sometimes leak or have inconsistent power output, which can affect the thermometer’s performance.
- Replace Batteries Promptly: When the battery indicator shows low power, or if you notice the thermometer acting sluggishly, replace the batteries as soon as possible. Don’t wait until it completely stops working.
- Remove Batteries for Long Storage: If you don’t plan to use your thermometer for a long time (several months), it’s a good idea to remove the batteries. This prevents them from leaking and corroding the battery compartment.
- Check Battery Contacts Regularly: As mentioned earlier, periodically check the battery contacts for any signs of corrosion and clean them if necessary.
Consistent battery care is essential for the reliable operation of any digital device. It prevents unexpected shutdowns and ensures that the thermometer has enough power to function accurately.
Frequently Asked Questions
Question: How often should I reset my meat thermometer?
Answer: You generally don’t need to reset your meat thermometer unless it’s acting strange, like giving incorrect readings or not turning on. Regular cleaning and battery changes are more important than frequent resets.
Question: Can I reset a meat thermometer that uses a wire?
Answer: Yes, for wired probe thermometers, you can usually reset them by removing and reinserting the batteries in the main display unit. Make sure the wire connection is also clean and secure.
Question: What does it mean if my thermometer shows “Err” or “Lo”?
Answer: These are typically error codes. “Err” might mean there’s a problem with the sensor or electronics, while “Lo” often indicates the temperature is too low to measure, or there’s a battery issue. Check your manual, and try a battery pull reset.
Question: Does resetting my meat thermometer erase its settings?
Answer: Often, yes. After a reset, you might need to re-select your preferred temperature unit (Fahrenheit or Celsius) or re-pair the device if it’s a smart thermometer.
Question: My thermometer is still not working after resetting. What should I do?
Answer: If resetting, cleaning, and checking batteries don’t fix the issue, your thermometer might be broken. It might be time to consider purchasing a new one, especially if it’s an older model.

Final Thoughts
Resetting your meat thermometer is a simple fix for many common issues. Usually, a quick battery pull does the trick. Keep your thermometer clean and its batteries fresh for the best performance.
If problems persist, it might be time for a new one.


