
It’s super common for beginners to run into a problem where their meat thermometer isn’t holding its temperature reading steady. This can be a bit puzzling when you’re just trying to get your cooking just right. Don’t worry, though!
We’re going to look at why this happens and give you a simple, step-by-step way to fix it. Stick around, and we’ll get your thermometer working like a charm.
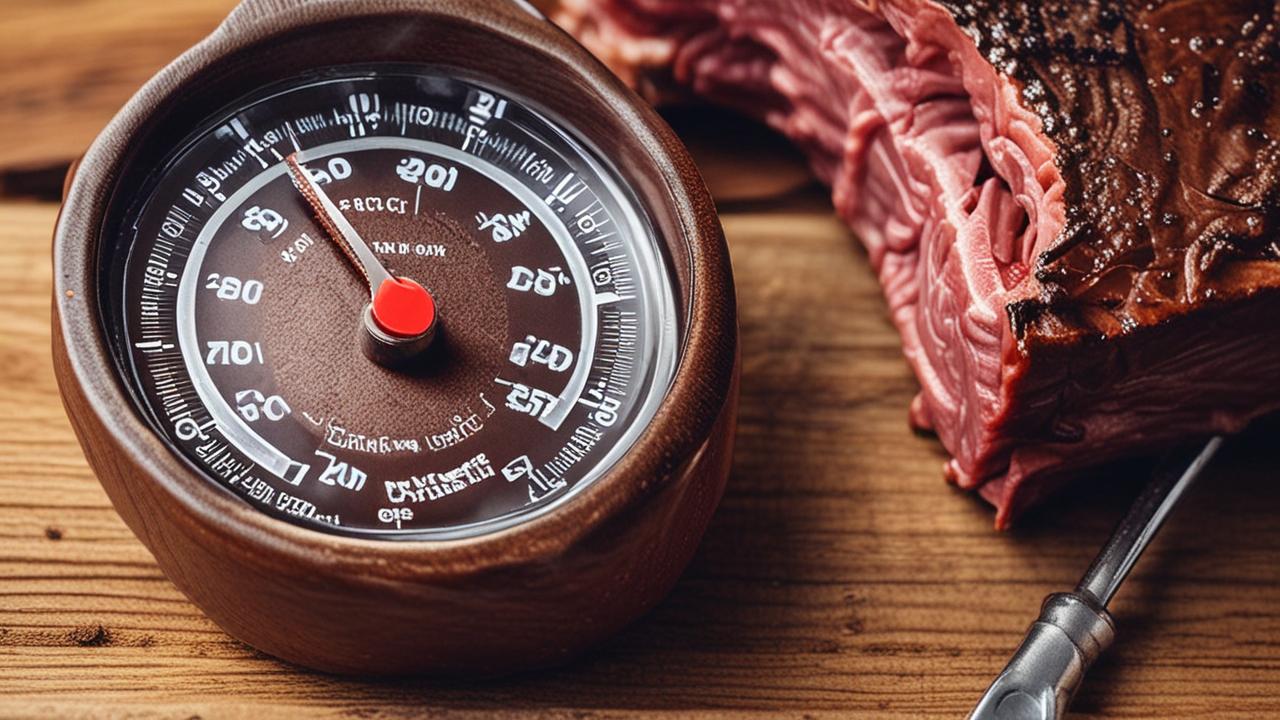
Why Your Meat Thermometer Isn’t Holding Temperature
When your meat thermometer seems to be acting up and not holding its temperature, it can really throw a wrench in your cooking plans. For anyone new to cooking with precise temperature readings, this issue can feel confusing and frustrating. It might seem like a complicated problem, but often the reasons are quite simple and easy to address.
This section will explore the common culprits behind a fluctuating or inaccurate thermometer reading, setting the stage for practical solutions.
Common Causes of Fluctuating Readings
One of the most frequent reasons for a thermometer not holding temperature is simply a weak or dying battery. Like any electronic device, thermometers rely on a power source, and when that source is low, the internal components can’t function correctly. This often leads to erratic readings, or the temperature might seem to drift up or down unpredictably.
Another common issue is a loose connection between the probe and the thermometer unit. If the probe isn’t fully seated or if the wiring within the probe is damaged, the signal to the display can be interrupted. This can cause the temperature to jump around or drop to zero as if it’s not sensing anything.
Dirt and grime buildup on the probe tip can also affect accuracy. Food particles or residue can act as an insulator, preventing the probe from making direct contact with the meat. This leads to readings that are too low or unstable.
Regular cleaning is key to maintaining a reliable thermometer.
Finally, the thermometer itself might be malfunctioning due to age or physical damage. If it’s been dropped or exposed to extreme temperatures, internal components could be compromised. In such cases, the thermometer might simply be past its prime and need replacing.
Battery Power Explained
Batteries are the lifeblood of most modern meat thermometers. They provide the electrical energy needed for the thermometer’s sensors to detect heat and for the display to show the reading. When a battery starts to fade, it can’t consistently supply the right amount of power.
Think of it like a flashlight with a weak battery. The beam might flicker or dim, making it hard to see. Similarly, a low battery in a thermometer can cause the internal processor to struggle, leading to readings that are not stable.
It might display a temperature and then suddenly change without the actual heat of the meat changing.
Some thermometers give a low battery warning, but others don’t. This means you have to be proactive about battery changes. Using high-quality batteries can also make a difference, as they tend to last longer and provide a more stable power output.
Replacing the battery is usually the first and easiest step when you notice your thermometer acting strangely. It’s a quick fix that often resolves the problem entirely.
Probe Connection Issues
The probe is the part that goes into the food, and it’s connected to the main body of the thermometer. This connection needs to be solid for the thermometer to work correctly. If the probe is wobbly or not pushed in all the way, it can cause problems.
The wires inside the probe are delicate. If they get bent, kinked, or broken, the temperature signal can’t reach the display. This can result in the display showing strange numbers, or nothing at all.
It’s like a loose wire on a lamp – the light won’t turn on consistently.
To check the connection, gently wiggle the probe where it meets the thermometer body. If it feels loose, try pushing it in further. Make sure there’s no visible damage to the probe’s casing or the cord.
If you suspect a damaged probe, it’s often best to replace it. Many thermometers have interchangeable probes, which can be a more cost-effective solution than buying a whole new thermometer.
Dirt and Residue on the Probe
Food particles, grease, and marinades can stick to the probe tip. These can create a barrier between the probe and the meat. This barrier can affect how well the probe senses the true temperature of the food.
Imagine trying to feel the warmth of a mug through a thick glove. The glove would insulate your hand, making it seem less hot than it really is. Food residue works in a similar way, making your thermometer read lower than the actual temperature of the meat.
It’s also possible for residue to get into the connection point of the probe, interfering with the electrical signal. This can cause those unpredictable jumps and drops in temperature readings.
Regular cleaning after each use is the best way to prevent this. A good scrub with warm, soapy water should do the trick. Make sure to dry the probe thoroughly before storing it.
Understanding Thermometer Technology
Meat thermometers have become quite sophisticated. Most digital thermometers use a thermistor or a thermocouple to measure temperature. These are tiny electronic components that change their electrical resistance or voltage based on the heat they are exposed to.
This change is then converted into a digital reading that you see on the display.
A thermistor is a type of resistor whose resistance is strongly dependent on temperature. Thermocouples, on the other hand, use two different metals that produce a small voltage when heated. Both are very sensitive to temperature changes.
The accuracy of these sensors can be affected by several factors. If the sensor itself is damaged, it won’t be able to accurately detect the heat. Similarly, if the wiring that carries the signal from the sensor to the processing unit is faulty, the reading will be unreliable.
Understanding these basics helps explain why certain issues, like probe damage or electronic component failure, can lead to a meat thermometer not holding temperature. It’s not magic; it’s electronics and physics at play.
Thermistor vs. Thermocouple
Thermistor-based thermometers are generally more affordable and offer good accuracy for home cooking. They work by measuring the change in resistance of a semiconductor material as its temperature changes. As the temperature goes up, the resistance of a negative temperature coefficient (NTC) thermistor goes down, and vice versa.
Thermocouple thermometers are typically more expensive but are known for their speed and ability to measure a wider range of temperatures. They are made of two different metals joined at one end, called the measuring junction. When this junction is heated or cooled, it creates a small voltage difference between the two metals.
This voltage is directly proportional to the temperature difference.
For most home cooks, the difference in performance between a good thermistor and a thermocouple thermometer is minimal for everyday tasks like grilling or roasting. However, for professional chefs or those doing very precise sous vide cooking, the speed and accuracy of a thermocouple can be more advantageous.
When a thermometer isn’t holding temperature, it could be an issue with the specific sensor type, but more often it’s related to how the sensor is connected or powered.
The Role of the Display and Electronics
The digital display on your thermometer is powered by a small circuit board that takes the signal from the sensor and converts it into a readable number. This circuit board also manages the battery power and any special features, like hold functions or alarms.
If this circuit board gets damaged, perhaps from water getting inside the thermometer, it can lead to all sorts of problems. The display might go blank, show random characters, or, as we’re discussing, fail to hold a steady temperature reading. It’s like the brain of the thermometer, and if it’s not working right, nothing else will either.
Environmental factors can also play a role. Extreme heat or cold can affect the performance of the electronic components. While meat thermometers are designed to withstand kitchen temperatures, dropping one or leaving it out in the sun can cause internal damage.
When a thermometer behaves erratically, it’s often a sign that one of these electronic components is failing or has been compromised in some way.
Troubleshooting Steps for a Meat Thermometer Not Holding Temperature
When your thermometer starts acting up, don’t panic! There are several easy steps you can take to diagnose and fix the issue. Most problems are related to power, connection, or cleanliness, all of which are user-fixable.
We’ll walk you through each step, starting with the simplest solutions.
First, always check the battery. A dead or low battery is the most common reason for a thermometer to give unreliable readings or not hold temperature. Replacing it with a fresh, high-quality battery is a quick and often effective fix.
Next, inspect the probe. Ensure it’s clean and free from any food debris. Gently clean it with warm, soapy water and dry it thoroughly.
Also, check the connection point where the probe meets the thermometer body to make sure it’s secure.
If these basic steps don’t solve the problem, consider recalibrating your thermometer if it has that feature. Some digital thermometers can be recalibrated to ensure accuracy. We’ll cover how to do that.
Finally, if none of these steps work, the thermometer might be damaged internally. In such cases, it may be time to consider a replacement. But before you give up, let’s go through the process systematically.
- Check and Replace Batteries: This is the most straightforward solution. Open the battery compartment and insert a brand new battery, ensuring correct polarity.
- Clean the Probe Thoroughly: Use warm, soapy water and a soft cloth or brush. For stubborn bits, a gentle scrub pad might be needed, but avoid anything too abrasive. Rinse well and dry completely.
- Inspect Probe Connection: Ensure the probe is fully inserted into the thermometer unit. Wiggle it gently to check for looseness. If the probe is detachable, try reseating it.
- Test in Ice Water (Calibration Check): Fill a glass with ice and water. Submerge the probe tip in the ice water, ensuring it doesn’t touch the sides or bottom of the glass. A well-functioning thermometer should read close to 32°F (0°C) within a few seconds.
- Test in Boiling Water (Calibration Check): Carefully submerge the probe tip in boiling water. A properly functioning thermometer should read close to 212°F (100°C) at sea level. Note that altitude can affect boiling point.
- Review Manufacturer’s Instructions: Your thermometer’s manual might have specific troubleshooting tips for your model.
Battery Replacement and Maintenance
When you notice your thermometer acting up, the very first thing to do is replace the battery. It’s the easiest fix and often solves the issue completely. Most digital thermometers use small button cell batteries, like CR2032, or AAA batteries.
Make sure you’re using fresh batteries. Batteries can lose their charge over time, even if they haven’t been used. It’s a good idea to keep a spare battery handy, especially if you use your thermometer frequently.
Using high-quality batteries can also provide more consistent power, which is important for accurate readings.
After replacing the battery, turn on the thermometer and see if the reading is stable. If it’s still fluctuating, the battery might not have been the sole culprit, but it’s still a good practice to ensure you have good power.
Some people even recommend replacing batteries every six months to a year as a preventative measure, especially if they rely on their thermometer for critical cooking tasks. This ensures you’re not caught off guard by a dead battery mid-roast.
Inspecting and Cleaning the Probe
The probe is the workhorse of your thermometer. It’s constantly exposed to food, grease, and heat. Over time, tiny food particles and grease can build up on the probe tip and even on the wire connecting it to the unit.
This residue can act as an insulator. When the probe is inserted into food, the residue can prevent direct contact with the meat, leading to inaccurate temperature readings. It might make the meat seem cooler than it actually is, or cause the temperature to jump around as the residue shifts.
To clean it properly, use warm, soapy water and a soft cloth. For tougher grime, a gentle scrub brush can be effective. Make sure to rinse the probe thoroughly to remove all soap residue and then dry it completely with a clean towel before using it or storing it.
Never put the probe in a dishwasher, as this can damage the internal components. Handwashing is always the safest bet. A clean probe is essential for accurate and stable temperature readings.
Calibration Checks and Recalibration
Your meat thermometer needs to be accurate to be useful. Sometimes, even with good batteries and a clean probe, the thermometer might be reading incorrectly. This is where calibration comes in.
Calibration is the process of checking the accuracy of your thermometer against known temperatures. The two most common checks are using ice water and boiling water.
For the ice water check, you want to achieve a temperature of 32°F (0°C). For the boiling water check, at sea level, you’re aiming for 212°F (100°C). It’s important to remember that the boiling point of water changes with altitude, so for boiling water checks, you might need to adjust your expected reading based on your location.
If your thermometer isn’t reading correctly in these tests, some models can be recalibrated. This process varies by manufacturer, so it’s crucial to consult your thermometer’s manual for specific instructions.
If recalibration isn’t possible or doesn’t fix the issue, it might indicate a more serious internal problem with the thermometer’s sensor or electronics.
The Ice Water Test
This is a simple yet effective way to check if your thermometer is working correctly at a cold temperature. Fill a glass with ice cubes and then add enough water to cover the ice. Let it sit for a minute or two so the water gets really cold.
Insert the probe of your thermometer into the ice water, making sure it’s fully submerged but not touching the sides or bottom of the glass. Stir the mixture gently with the probe.
Within about 30 seconds to a minute, a properly calibrated thermometer should read very close to 32°F (0°C). If it reads significantly higher or lower, it indicates that the thermometer might need recalibration or is not functioning accurately.
This test is great because ice water provides a stable, known temperature that’s easy to achieve in any kitchen.
The Boiling Water Test
This test checks your thermometer’s accuracy at a hot temperature. Bring a pot of water to a rolling boil on your stovetop. Use a deep enough pot so you can submerge the probe without it touching the bottom.
Carefully insert the probe into the boiling water. Again, avoid touching the sides or bottom of the pot. Stir the water gently with the probe.
At sea level, pure boiling water should register 212°F (100°C). If your thermometer reads significantly different, it could be an issue. Remember that the boiling point decreases at higher altitudes.
For example, in Denver, Colorado (about a mile high), water boils at around 202°F (94°C). So, if your thermometer reads 202°F in Denver, it’s actually working perfectly for that location.
If the reading is off even after accounting for altitude, it’s a strong sign that the thermometer needs recalibration or might be faulty.
When to Consider Replacing Your Thermometer
Sometimes, despite your best efforts with troubleshooting, a meat thermometer can become unreliable. If you’ve gone through the steps of checking batteries, cleaning the probe, and performing calibration tests, and the thermometer still isn’t holding a steady or accurate temperature, it might be time for a new one.
Electronic devices have a lifespan, and thermometers are no exception. Physical damage, wear and tear, or internal component failure can all render a thermometer useless. Continuing to use an inaccurate thermometer can lead to undercooked or overcooked food, which is not only disappointing but can also be a food safety risk.
This section will guide you on recognizing the signs that your thermometer has reached the end of its useful life and what to look for in a reliable replacement to avoid future issues. Investing in a good quality thermometer is a small price to pay for perfectly cooked meals and peace of mind.
Signs of a Failing Thermometer
Beyond just an unstable reading, there are other subtle signs that your thermometer might be on its way out. One common indicator is a slow response time. If it takes a very long time for the thermometer to register a temperature, or if the reading lags significantly behind the actual heat, it’s a sign of trouble.
Another sign is a completely erratic or nonsensical display. If the numbers jump wildly, show random symbols, or the display flickers inconsistently, the internal electronics are likely failing. You might also notice that the thermometer struggles to read even in extreme temperatures, like when placed in boiling water.
If the probe wire itself appears damaged, frayed, or corroded, this can also lead to inaccurate readings. Even if the main unit seems fine, a compromised probe means you won’t get a reliable temperature measurement. In these cases, even if it’s just the probe that’s damaged, it’s often more cost-effective to replace the entire unit, especially if it’s an older model.
When these issues persist after basic troubleshooting, it’s a clear indication that the internal components of the thermometer have likely failed, and a replacement is the most sensible option.
Physical Damage and Wear
Meat thermometers, especially digital ones, contain delicate electronic components. Dropping the thermometer, exposing it to excessive moisture, or storing it improperly can all lead to physical damage. This damage might not always be visible on the outside.
For instance, if the thermometer was dropped, the internal circuit board or the sensor could have been jarred loose or cracked. If water seeped into the unit, it can cause corrosion on the electronic components, leading to malfunctions.
Even without obvious accidents, the constant exposure to heat and kitchen environments can cause wear and tear over time. The display might become faded, buttons can become unresponsive, or the probe’s wire can become brittle and crack.
It’s important to treat your thermometer with care. Store it in a dry place, avoid submerging the entire unit in water (unless it’s specifically waterproof), and be gentle with the probe. If you notice any physical signs of damage, it’s a good reason to consider a replacement to ensure accuracy.
Inconsistent or Unstable Readings
The most frustrating sign of a failing thermometer is when it consistently gives inconsistent or unstable readings. You might insert it into the same piece of meat multiple times and get a different temperature each time, or the temperature might slowly creep up or down without the meat actually cooling or heating.
This instability is often a result of a faulty sensor or a problem with the internal electronics that process the temperature data. The thermometer is essentially struggling to get a stable signal from the probe and convert it into a reliable number.
For example, you might be cooking a chicken breast, and the thermometer reads 150°F, then a few seconds later it jumps to 155°F, and then drops to 148°F, all without you moving the thermometer or the chicken.
Such erratic behavior is a strong indicator that the thermometer is no longer trustworthy. It’s better to invest in a new one than to risk serving undercooked poultry or drying out a perfectly good cut of meat.
Choosing a Reliable Replacement Thermometer
When it’s time to buy a new meat thermometer, there are a few things to consider to ensure you get a reliable tool. The market offers a wide range of options, from basic digital models to high-tech wireless thermometers. For most home cooks, a fast, accurate, and easy-to-use digital instant-read thermometer is a great choice.
Look for thermometers that have a fast response time, meaning they give you a reading within a few seconds. Accuracy is also key; aim for one that’s accurate to within a degree or two. Features like a backlit display, a hold function (to lock in the temperature), and a durable probe can enhance your cooking experience.
Consider thermometers with a protective sheath for the probe, which also helps with storage and safety. If you’re grilling outdoors or doing low-and-slow cooking, a wireless or Bluetooth-enabled thermometer can be incredibly convenient, allowing you to monitor temperatures from your phone.
Reading reviews from other users can also be very helpful in identifying models that are known for their reliability and durability. Investing a little more in a quality thermometer can save you a lot of frustration in the long run.
Digital Instant-Read Thermometers
These are the workhorses for most home cooks. They feature a digital display and a probe that you insert directly into the food. They are designed to give you a temperature reading very quickly, often within 3-10 seconds.
When choosing one, pay attention to the temperature range it can measure and its accuracy. A good instant-read thermometer will be accurate to +/- 1-2°F (0.5-1°C) and should cover the typical cooking temperatures for meats, poultry, and baked goods.
Features to look for include a sturdy stainless-steel probe, a comfortable handle, and a clear, easy-to-read display. Some models have a probe that folds into the handle for compact storage, while others have a separate probe connected by a wire, which can be useful for oven use.
The speed and accuracy of these thermometers make them indispensable for ensuring food is cooked to the correct internal temperature, which is crucial for both taste and food safety. They are generally affordable and easy to maintain.
Wireless and Smart Thermometers
For those who love grilling, smoking, or doing extended oven roasts, wireless or smart thermometers offer a new level of convenience. These thermometers typically have a probe that stays in the meat and transmits temperature data wirelessly to a base unit or a smartphone app.
This allows you to monitor the cooking process from a distance, whether you’re in the living room or across the yard. Many smart thermometers come with features like customizable temperature alerts, cooking timers, and even recipe suggestions based on the meat you’re cooking.
The range of the wireless signal is an important factor to consider. Bluetooth thermometers generally have a shorter range (up to 30-50 feet), while Wi-Fi or radio-frequency models can transmit over much longer distances.
While these can be more expensive than basic digital thermometers, the ability to leave the oven or grill unattended with peace of mind can be well worth the investment for serious home cooks.
Maintaining Your Meat Thermometer for Longevity
Once you have a reliable meat thermometer, taking care of it is key to ensuring it lasts and continues to provide accurate readings. Proper maintenance isn’t complicated and can prevent many of the issues that cause a meat thermometer not holding temperature. It’s about simple habits that extend the life of your valuable kitchen tool.
The most important aspects of maintenance involve cleaning, proper storage, and being mindful of how you use the thermometer. By following a few simple guidelines, you can keep your thermometer in top working condition for years to come, saving you money and ensuring perfectly cooked food every time.
We’ll cover the best practices for keeping your thermometer clean, how to store it safely, and some usage tips that will help prevent damage and maintain accuracy. These steps are designed to be easy to follow, even for those who are new to using digital thermometers.
Cleaning Best Practices
As we’ve touched upon, cleaning is paramount. After every use, you must clean the probe thoroughly. This prevents food particles from accumulating and affecting future readings.
Use warm, soapy water and a soft cloth or sponge. For stubborn residue, a gentle scrub brush can be used, but avoid abrasive materials like steel wool, which can scratch the probe surface and potentially harbor bacteria.
Rinse the probe completely to remove any soap residue. Then, dry it thoroughly with a clean, lint-free cloth. Moisture left on the probe can lead to corrosion over time, especially where the probe meets the wire or the thermometer body.
For the thermometer’s body, wipe it down with a damp cloth. Avoid immersing the entire thermometer unit in water unless the manufacturer’s instructions explicitly state it is waterproof. Water ingress into the electronic components is a common cause of failure.
If your thermometer has a protective sheath for the probe, clean and dry that as well. A clean sheath protects the probe when stored and keeps the unit hygienic.
Washing the Probe
The probe is the part that comes into direct contact with food, so it needs careful attention. For most digital thermometers, the probe is made of stainless steel, which is durable and easy to clean. However, it’s not dishwasher safe.
The heat and harsh detergents in a dishwasher can damage the sensitive electronics within the probe itself or at the point where it connects to the thermometer. Always hand wash the probe.
Use a mild dish soap and warm water. If there’s grease, a degreasing dish soap can be helpful. You can gently scrub the probe with a soft brush or even a corner of a sponge.
Make sure to get into any nooks or crannies where food might be stuck.
After washing, rinse the probe under running water. Then, immediately dry it with a clean kitchen towel or paper towel. Ensure the entire probe, especially the tip, is completely dry before storing it or using it again.
Cleaning the Thermometer Body
The main body of the thermometer, which houses the display and the electronics, should be cleaned with a damp cloth. You don’t need to use soap for the body unless it’s particularly dirty.
A slightly damp cloth is usually sufficient to wipe away any fingerprints or splatters. Wring out the cloth well so it’s not dripping wet. You don’t want excess water getting into the device’s internal workings.
If there’s a specific spot that’s difficult to clean, you can use a cotton swab dampened with water or rubbing alcohol (if recommended by the manufacturer). Be very careful not to let any liquid seep into the battery compartment or through any seams in the casing.
Regularly wiping down the body will keep it looking good and prevent the build-up of grime that could eventually affect its functionality.
Proper Storage Techniques
How you store your thermometer can significantly impact its lifespan and performance. The goal is to protect the probe and the delicate electronic components from damage, moisture, and extreme temperatures.
Many digital thermometers come with a protective sheath or case for the probe. Always use this sheath when the thermometer is not in use. This prevents the probe from being bent, scratched, or poked accidentally.
It also keeps the probe tip clean until its next use.
Store the thermometer in a dry drawer or container. Avoid storing it near heat sources, like the stove or oven, or in humid areas like directly above the sink. Extreme temperatures can degrade the batteries and affect the electronic components over time.
If your thermometer has a foldable probe, ensure it’s fully folded and secured before storing. This prevents the probe from accidentally opening and getting damaged. For wireless thermometers with separate probes, ensure the probe’s wire is not kinked or tightly wound, which can damage the internal wires.
A dedicated spot in your utensil drawer, perhaps with other frequently used cooking tools, can make it easy to find and ensure it’s always stored safely.
Using the Probe Sheath
The probe sheath is more than just a cover; it’s an essential part of your thermometer’s care. It protects the sharp probe tip from bending or breaking, which can happen if it’s jostled around in a drawer. A bent probe is not only less effective but also harder to insert into food.
The sheath also keeps the probe clean. When you store the probe with the sheath on, it’s protected from dust and other kitchen debris. This means less cleaning is needed before the next use, and you can be more confident about its hygiene.
Some sheaths are designed to be washed. If yours is, clean and dry it thoroughly before placing the probe back inside. Always ensure the probe is completely dry before putting it into its sheath.
If your thermometer didn’t come with a sheath, consider purchasing a universal one or storing the probe in a safe place where it won’t be damaged, perhaps in a small container.
Avoiding Extreme Temperatures
Electronic devices, including meat thermometers, are sensitive to temperature. Leaving your thermometer in a hot car, near a window that gets direct sunlight, or in a very cold garage can cause problems.
Extreme heat can shorten the lifespan of the batteries and damage the LCD screen, causing the display to fade or become distorted. It can also affect the accuracy of the sensor. High heat can also cause plastic components to warp.
Extreme cold can also impact battery performance, making them drain faster. While most meat thermometers are designed to operate in typical kitchen temperatures, prolonged exposure to temperatures outside their recommended range can cause malfunctions.
The best practice is to store your thermometer at room temperature, in a stable environment. This ensures the batteries remain healthy and the electronic components function as intended, leading to more consistent and accurate readings over time.
Meat Thermometer Not Holding Temperature: A Final Look
It’s perfectly normal for a meat thermometer not holding temperature to be a confusing issue for many. We’ve explored common reasons like battery issues, probe problems, and dirt. Simple fixes like battery changes and cleaning usually solve it.
If not, a calibration check can tell you if it’s time for a replacement.
Frequently Asked Questions
Question: Why is my digital meat thermometer showing random numbers?
Answer: Random numbers often indicate a weak battery, a loose probe connection, or internal electronic damage. Try replacing the battery first, then check the probe connection. If the issue persists, the thermometer might be faulty.
Question: Can I use my meat thermometer in the dishwasher?
Answer: No, most meat thermometers, especially digital ones, are not dishwasher safe. The heat and harsh detergents can damage the electronic components and the probe. Always hand wash the probe and wipe the body with a damp cloth.
Question: My thermometer reads 32°F in ice water, but is off in boiling water. What’s wrong?
Answer: This could be due to altitude affecting the boiling point of water, or it might indicate an issue with the thermometer’s accuracy at higher temperatures. Recalibrate if possible, and remember to adjust for altitude if you do a boiling water test.
Question: How often should I replace the battery in my meat thermometer?
Answer: It’s a good idea to replace the battery every 6-12 months, or if you notice any signs of inaccurate readings or slow response. Keeping a spare fresh battery is always a good idea.
Question: Is it worth repairing a broken meat thermometer?
Answer: For most digital meat thermometers, repair is often not cost-effective. The cost of parts and labor can approach or exceed the price of a new, reliable thermometer. Replacing it is usually the best option.
Summary
When your meat thermometer isn’t holding temperature, start with simple checks: new batteries, a clean probe, and a secure connection. If it’s still unstable, calibration tests can reveal if it’s time for a new one. Caring for your thermometer ensures it stays accurate.


