
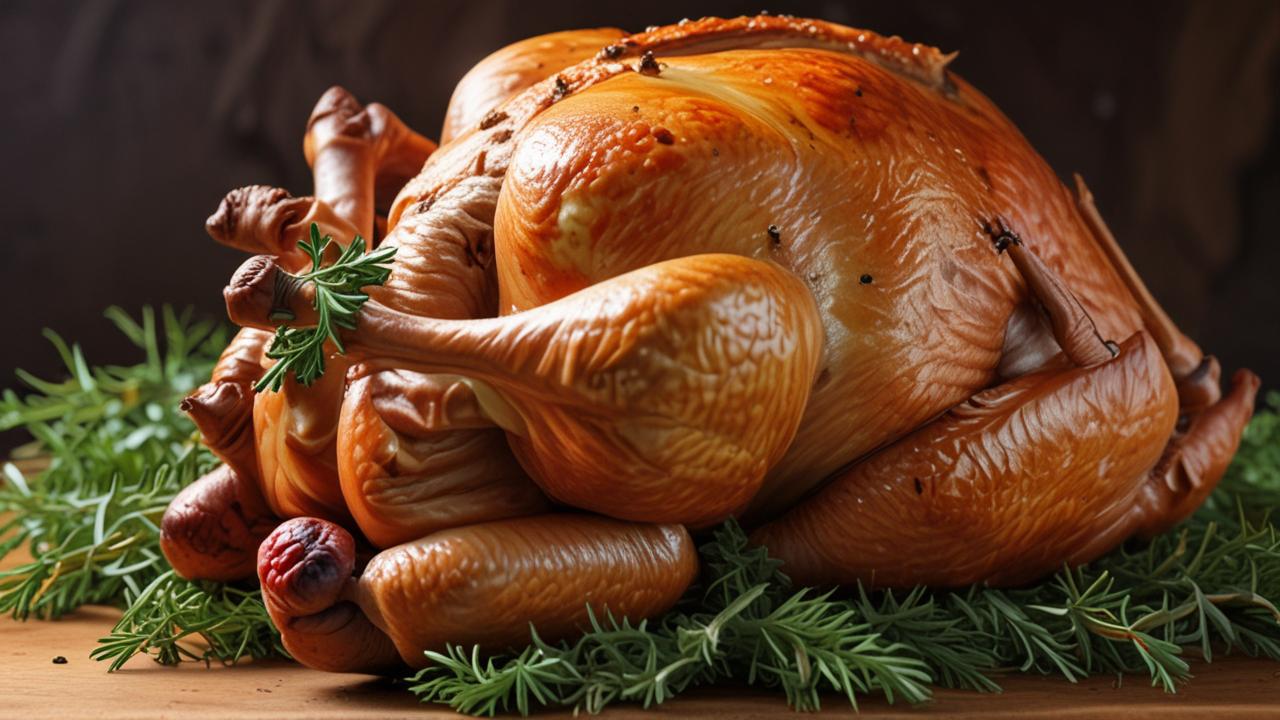
Figuring out Where to Insert Meat Thermometer in Turkey can seem tricky, especially if you’re cooking one for the first time. You want that bird to be perfectly cooked, juicy, and safe to eat, but knowing the right spot for the thermometer is key. Don’t worry, it’s much simpler than you might think!
We’ll walk through it step-by-step so you can feel confident. Get ready to learn how to get it just right every time.
Finding the Best Spot for Your Turkey Thermometer
Getting the temperature right in your turkey is super important for a delicious and safe meal. If you put the thermometer in the wrong place, you might get a reading that’s too high or too low, leading to either an undercooked, unsafe bird or a dry, overcooked one. This part of cooking can feel a little confusing for newcomers, but we’re here to make it as easy as possible.
We’ll cover all the spots you need to know about so you can be sure you’re measuring the heat in the thickest, most central part of the turkey.
Why Accurate Temperature is Essential
Cooking food to the correct internal temperature is the most reliable way to ensure it’s safe to eat. For poultry like turkey, this is especially true because undercooked meat can harbor harmful bacteria like Salmonella. A meat thermometer takes the guesswork out of cooking.
It provides a precise reading, eliminating the need to rely on visual cues alone, which can be misleading. This is vital for preventing foodborne illnesses and for achieving the best possible taste and texture from your turkey.
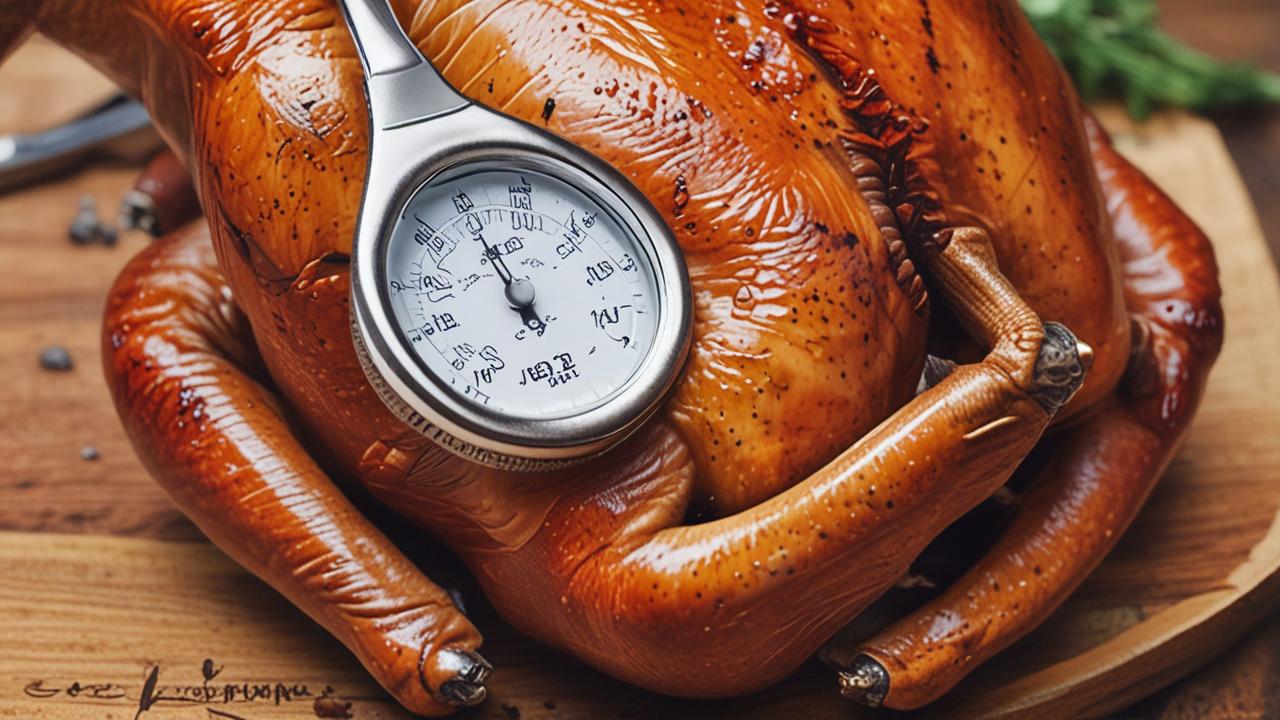
The target temperature for turkey is 165 degrees Fahrenheit (74 degrees Celsius). This temperature is hot enough to kill any harmful bacteria present in the meat. When using a thermometer, it’s not just about the final number; it’s also about where you take that measurement.
Placing the thermometer correctly ensures you are measuring the deepest part of the meat, which is usually the last part to cook.
Understanding Thermometer Types
There are a few main types of meat thermometers that home cooks use. Each has its own advantages. Knowing what they are and how they work can help you choose the best one for your needs and understand how to get accurate readings.
- Instant-Read Thermometers: These are small, digital or dial thermometers with a metal probe. You insert the probe into the food, and it gives you a reading in just a few seconds. They are great for checking multiple spots quickly and are very easy to use. For turkey, they are handy for double-checking different areas.
- Oven-Safe Thermometers (with Remote Display): These often come with two parts: a probe that stays in the turkey inside the oven and a transmitter that sends the temperature reading to a display unit you keep outside the oven. This is very convenient because you don’t have to open the oven door, which lets heat escape and can slow down cooking.
- Dial Oven Thermometers: These are older-style thermometers that you place directly in the oven. They measure the oven’s temperature, not the turkey’s internal temperature. While useful for checking if your oven is calibrated correctly, they don’t tell you when the turkey is done.
The most common and effective thermometers for knowing when your turkey is cooked are the instant-read and the oven-safe types with a remote display. They directly measure the turkey’s internal heat, giving you the most accurate information for food safety and cooking success.
The Core Principle: Thickest Part of the Thigh
When you’re trying to figure out Where to Insert Meat Thermometer in Turkey, the main idea is to find the deepest, thickest part of the meat that isn’t touching bone. The thigh is usually the best place for this. This area takes the longest to cook thoroughly.
If the thigh reaches the safe temperature, you can be confident the rest of the bird will too. It’s about finding the coolest spot to ensure it gets hot enough.
Think about the structure of a turkey. The breast meat cooks faster than the dark meat in the thighs and legs. If you only checked the breast, you might pull the turkey out too early, leaving the thighs undercooked.
Conversely, if you waited for the thighs to be done and measured in the breast, the breast might become dry and tough. So, the thigh is your reliable indicator.
Where NOT to Insert the Thermometer
It’s just as important to know where not to put your thermometer. Putting it in the wrong spot can give you a false reading, which is why some people end up with a turkey that’s not quite right. Avoiding these areas will help you get a much better result.
- Near the Bone: The bone conducts heat differently than the meat. If your thermometer probe touches the bone, it will register a higher temperature than the surrounding meat. This can trick you into thinking the turkey is done when it’s not. Always aim to keep the probe in the fleshy part.
- The Cavity: The inside of the turkey cavity is usually much cooler than the meat itself, especially if it’s stuffed. Measuring the temperature here will give you a low reading and won’t tell you if the meat is cooked. The stuffing should also reach 165 degrees Fahrenheit for safety.
- Too Close to the Skin: The skin can get very hot and brown quickly. If the probe is too close to the skin, you might get a temperature reading that’s too high. This can cause you to remove the turkey before the deeper meat is cooked.
- The Breast Meat (as the sole check): While the breast needs to be cooked, it cooks faster than the thighs. Checking only the breast might mean the darker meat is still undercooked and unsafe. Always prioritize the thigh measurement.
By avoiding these common pitfalls, you’ll be much closer to accurately measuring your turkey’s doneness.
Specific Locations for Thermometer Placement
Let’s get down to the exact spots where you should aim to to Insert Meat Thermometer in Turkey.
The primary goal is to find the center of the thickest part of the thigh. We’re talking about the muscle, not the bone. You want to insert the probe deep into the flesh.
Measuring the Thigh
The turkey thigh has two main parts: the drumstick (the lower leg) and the upper thigh. Both are great places to check. You want to insert the thermometer probe into the thickest part of the upper thigh, angling it slightly towards the body of the turkey but making sure it does not touch the bone.
Imagine you are trying to find the very center of the thigh muscle.
For a whole bird, it’s often recommended to measure both thighs. This is because one thigh might cook slightly faster than the other. If you are using an oven-safe thermometer with a probe, you can insert one probe into the thickest part of one thigh and another into the thickest part of the other thigh.
This gives you a very reliable overall picture of the turkey’s cooking progress.
Checking the Drumstick
The drumstick, the part you hold when you eat chicken wings, is also a good indicator. Insert the thermometer probe into the thickest fleshy part of the drumstick, again avoiding the bone. Make sure the probe goes in deep enough to get a reading from the center of the meat.
Sometimes, the drumstick might cook a little faster than the upper thigh, but it’s still a very reliable spot to check for doneness.
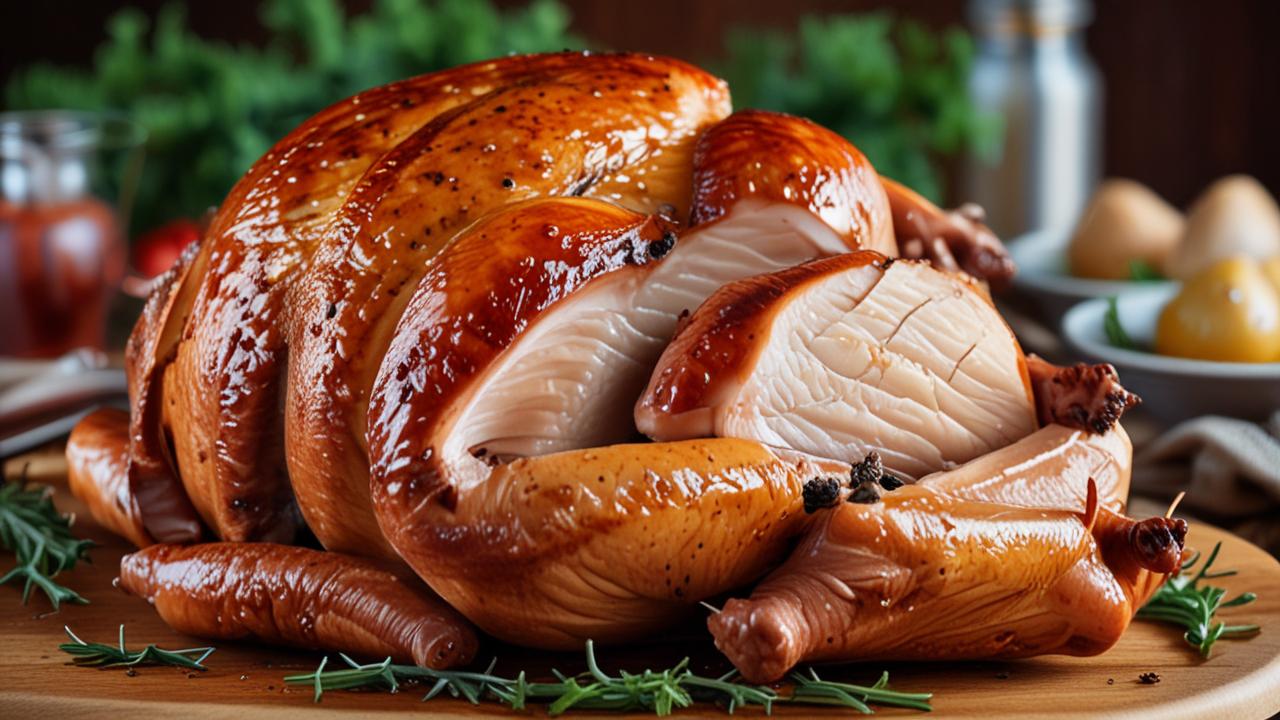
Measuring the Breast (Secondary Check)
While the thigh is your primary target, it’s also a good idea to check the breast, especially if you are using an instant-read thermometer. The breast meat should reach 165 degrees Fahrenheit (74 degrees Celsius) as well. If you find that the thigh is done, but the breast is still lagging, you can often finish cooking the bird with the breast foiled to prevent it from drying out while the thigh catches up.
When checking the breast, might be a noticeable difference in cooking time between the two sides of the breast. Checking both sides can be beneficial if you notice uneven cooking.
However, always remember that the thigh is the most critical area for ensuring safety.
Using Different Types of Thermometers Effectively
The method for inserting your thermometer can vary slightly depending on the type you are using. Each type has its own best practices to ensure you get the most accurate temperature reading.
Instant-Read Thermometers in Action
These are your go-to for quick checks. You can use them multiple times throughout the cooking process or for a final confirmation. When using an instant-read thermometer, you will need to open the oven door briefly.
- until the reading stabilizes.
- Multiple Checks: For extra certainty, check the thickest part of the breast and also the thickest part of the stuffing (if you’ve stuffed the bird). Remember, the stuffing needs to reach 165 degrees Fahrenheit too.
- Speed: Be quick when opening the oven door to minimize heat loss. Close it as soon as you have your reading.
These thermometers are essential for verifying that all parts of the turkey have reached the safe internal temperature.
Oven-Safe Thermometers with Remote Displays
These are fantastic for hands-off cooking. You set it up before the turkey goes into the oven. You can then monitor the temperature from outside the oven.
- Setup: Insert the probe into the thickest part of the thigh, ensuring it is not touching the bone. Thread the wire through the oven door seal so the display unit sits on your counter.
- Monitoring: Keep an eye on the display unit. The alarm will usually go off when the set temperature is reached.
- Final Check: Even with these, it’s a good practice to use an instant-read thermometer for a final confirmation in both the thigh and the breast. Sometimes the probe might be placed slightly off, or the turkey might have hot spots.
This method allows for more consistent oven temperatures and less disturbance to the cooking environment.
Ensuring a Perfectly Cooked Turkey Every Time
By following these guidelines for Where to Insert Meat Thermometer in Turkey, you significantly increase your chances of cooking a perfect bird. It’s all about taking the guesswork out of the process and relying on a simple tool to give you accurate information.
Remember the key principle: the thickest part of the thigh, away from the bone. This is the area that needs the most attention to ensure it’s cooked through. Using a reliable thermometer is your best friend in the kitchen for achieving safe, delicious results.
A perfectly cooked turkey is not just about temperature; it’s also about resting the bird after cooking. Letting the turkey rest for 15-30 minutes before carving allows the juices to redistribute throughout the meat, resulting in a more moist and flavorful experience. This resting period is crucial and often overlooked, but it plays a big role in the final outcome.
Case Study: The Overcooked Breast Dilemma
Sarah was cooking her first Thanksgiving turkey. She was nervous about serving an undercooked bird. She kept checking the breast meat with her thermometer, and as soon as it hit 170 degrees Fahrenheit, she pulled it out of the oven.
To her dismay, the thighs were still pink inside and tasted a bit tough. She learned that day that the breast cooks much faster than the thighs. If she had focused on the thigh temperature first, she would have saved her turkey from becoming dry.
This scenario highlights the importance of checking the right spot. If Sarah had inserted her thermometer into the thigh and waited for that to reach 165 degrees Fahrenheit, she would have likely found the breast was also perfectly cooked, or perhaps just a degree or two warmer, which is ideal.
Scenario 1: First-Time Turkey Cook
You are hosting your family for the holidays and decided to cook a whole turkey. You have a new instant-read thermometer. After roasting for a few hours, you want to check if it’s done.
You carefully insert the thermometer probe into the thickest part of the turkey’s thigh, making sure it doesn’t touch any bones. You wait for the reading to appear on the digital display. If it shows 165 degrees Fahrenheit, you know your turkey is safely cooked and ready to rest.
If not, you put it back in the oven and check again in 15-20 minutes.
Scenario 2: Using a Roasting Thermometer
You have a turkey in the oven with a probe thermometer inserted into the thickest part of the thigh, connected to a display outside the oven. The display shows the temperature steadily climbing. You are preparing side dishes.
The alarm on your display unit goes off when the temperature reaches 165 degrees Fahrenheit. You then carefully remove the turkey from the oven to let it rest, confident that the meat is cooked safely and evenly.
Statistics on Food Safety
According to the USDA, approximately 1 in 4 chickens and turkeys sold in the United States will test positive for Campylobacter, and about half of those will test positive for Salmonella. Cooking poultry to an internal temperature of 165 degrees Fahrenheit is crucial to kill these bacteria. A 2018 study published in the Journal of Food Protection found that only 30% of home cooks always use a food thermometer when cooking poultry.
This indicates a significant opportunity to improve food safety practices in home kitchens.
| Food Item | Minimum Internal Temperature (Fahrenheit) | Minimum Internal Temperature (Celsius) |
|---|---|---|
| Turkey (whole bird, parts, and stuffing) | 165°F | 74°C |
| Ground Poultry (chicken, turkey) | 165°F | 74°C |
| Poultry Breasts, Whole, and Thighs (not ground) | 165°F | 74°C |
This table clearly shows that 165°F is the universal safe temperature for all poultry preparations. This reinforces the importance of accurate temperature measurement.
Understanding Turkey Doneness Beyond Temperature
While temperature is the most critical factor for safety and doneness, there are a few visual cues that can help you confirm your turkey is ready. These should always be used in conjunction with your thermometer, not as a replacement for it.
When your thermometer registers the correct temperature, you can also look at the juices. If the juices run clear when you pierce the thigh with a fork or knife, it’s another good sign. If they are pink or red, the turkey likely needs more cooking time.
Checking the Juices
The clarity of the juices is a traditional way to check for doneness. When you poke into the thickest part of the thigh, the juices that come out should be clear. If they have any pink or reddish tint, it indicates that the meat is still cooking and needs more time.
Some people mistake a slightly cloudy juice for an undercooked one, but clear is the key.
This visual cue is particularly helpful when you are using an oven-safe thermometer. You can do a final check with an instant-read thermometer, and if the temperature is correct, pierce the thigh to observe the juices. If they are clear and the temperature is 165°F, you are good to go.
Visual Cues for Cooked Turkey
Beyond the juices, there are other visual signs that your turkey is cooked. The legs should feel loose in their sockets. You should be able to move them around relatively easily.
The breast meat should appear opaque white, and the skin should be golden brown. However, these visual signs can sometimes be deceiving. A bird can look perfectly browned on the outside but still be undercooked inside, especially if cooked at a very high temperature.
It’s important to remember that browning is also affected by basting, the type of oven, and the presence of sugars in marinades or rubs. Therefore, relying solely on color can be misleading. Always let the thermometer be your final judge.
Resting Your Turkey
Once your turkey reaches the correct internal temperature, it’s not quite time to carve it. Resting the turkey is a vital step that many home cooks overlook. This allows the juices, which have been pushed to the center during cooking, to redistribute throughout the meat.
If you carve the turkey immediately after taking it out of the oven, all those delicious juices will run out onto the cutting board, leaving the meat dry and less flavorful. Letting it rest, tented loosely with foil, for at least 15-30 minutes (for a standard-sized turkey) is crucial for a moist and tender bird. For very large turkeys, you might need to rest it for up to 45 minutes.
Why Resting Matters
During cooking, the muscle fibers in the turkey contract, squeezing out moisture. Resting allows these fibers to relax, and the moisture is reabsorbed back into the meat. This process significantly improves the texture and juiciness of the turkey.
It’s a simple step that makes a huge difference in the final eating experience.
Think of it like this: the meat is “drinking” its own juices back up during the rest. This is why even if your turkey reaches the perfect temperature, it might still be dry if you don’t let it rest properly. So, plan your carving time around the resting period.
Troubleshooting Common Turkey Cooking Issues
Even with the best intentions and careful preparation, sometimes things don’t go exactly as planned. Here are a few common issues and how to address them, keeping in mind the importance of accurate temperature checks.
One common problem is uneven cooking. This can happen for several reasons, including hot spots in the oven or the turkey itself not being evenly shaped.
Uneven Cooking
If you notice that one part of your turkey is cooking much faster than another (e.g., the breast is browning rapidly while the thighs are still pale), you can take action. You can tent the faster-cooking parts loosely with aluminum foil to slow down their cooking. This allows the rest of the turkey to catch up without burning the exterior.
Another strategy for uneven cooking is to rotate the turkey in the oven halfway through the cooking time. This can help ensure more even heat distribution. Always remember to re-check the temperature in the thigh after making any adjustments or after the estimated cooking time is up.
Dry Turkey
A dry turkey is often the result of overcooking, which is frequently caused by relying on visual cues or inaccurate thermometer readings. If your turkey ends up a bit dry, a good trick is to make gravy or a pan sauce to add moisture when serving. You can also carve the turkey and arrange the slices in a serving dish, then ladle some warm gravy over them.
Brining the turkey beforehand (either wet or dry brining) is also a highly effective way to ensure moisture and flavor. Brining adds moisture and seasoning deep into the meat, making it more forgiving if you slightly overcook it. It’s a proactive measure to prevent dryness.
Frequently Asked Questions
Question: What is the most important place to insert a meat thermometer in a turkey?
Answer: The most important place to insert your meat thermometer is the thickest part of the thigh, making sure the probe does not touch the bone.
Question: Can I just check the turkey breast for doneness?
Answer: While you should check the breast, it cooks faster than the thigh. Relying only on the breast temperature can lead to an undercooked and unsafe thigh. Always prioritize the thigh measurement.
Question: What temperature should the turkey reach?
Answer: The internal temperature of the turkey should reach 165 degrees Fahrenheit (74 degrees Celsius) in the thickest part of the thigh.
Question: How long should I let a turkey rest after cooking?
Answer: You should let a turkey rest for at least 15-30 minutes after removing it from the oven. This allows the juices to redistribute, making the meat more moist and tender.
Question: My turkey’s skin is very brown, but the thermometer says it’s not done. What should I do?
Answer: If the skin is browning too quickly, tent the turkey loosely with aluminum foil. This protects the skin from burning while allowing the internal temperature to rise to a safe level.
Final Thoughts
Knowing Where to Insert Meat Thermometer in Turkey is simple: aim for the thickest part of the thigh, avoiding bone. This one tip ensures your turkey is cooked safely and perfectly. Trust your thermometer, let it rest, and enjoy a delicious meal.
You’ve got this!


